• The Mombot
  • Gift Guides
  • My Story
  • Food & Drink
  • Life
  • Home
  • DIY
  • Mama Style
  • Shop

The Mombot

Motherhood Simplified.

Our IKEA mudroom benches, 3 years later

April 11, 2018 | Leave a Comment

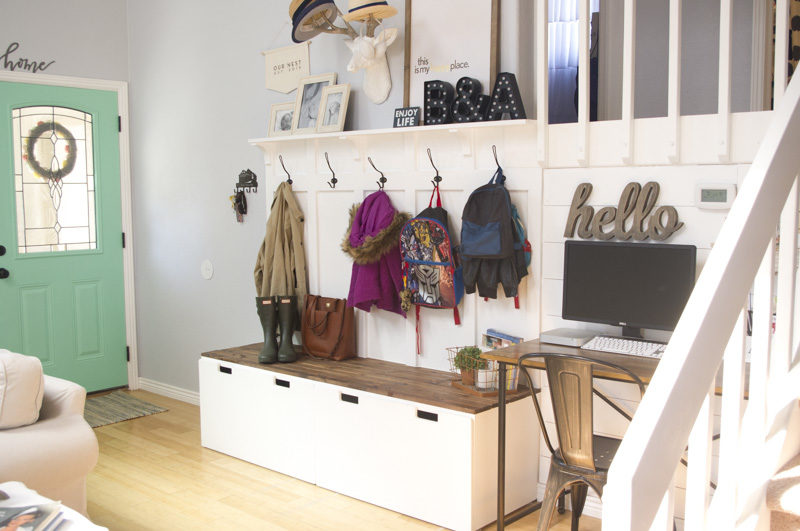
When we moved into our home 3 years ago, one of the first things we did was build a mudroom bench by the front door. With a family of 5 and seasonal weather, we knew we needed a place for shoes, hats, jackets, gloves, scarves and backpacks.

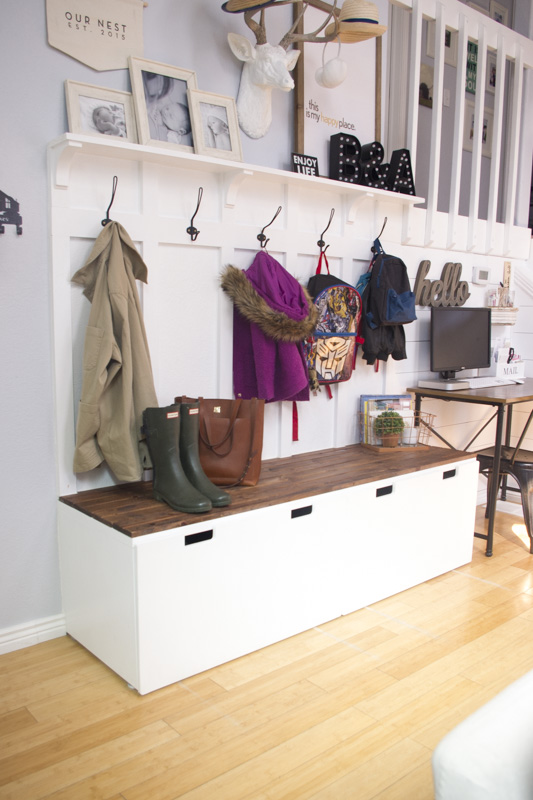
I hacked some IKEA benches and created the perfect spot for all our odds and ends, and I wrote up a big tutorial post on it here.

Since 2015, the post has been pinned over 17,000 times and appeared in the IKEAHackers.net book with 24 other IKEA hacks for the home – crazy! I love that people have identified with my need to declutter in order to de-stress!

mudroom benches, ikea hack, entryway organization, DIY mudroom, DIY entryway organization

Get the IKEAHackers.net book

Since it has been so popular, I thought I should write an update about how they are holding up after 3 years of wear and tear. So here’s a little review on what’s working, what’s not and what’s changed.

How is the Mudroom Bench holding up?

Mudroom Bench Drawers

Great! They still roll in and out several times a day with no issues.

Mudroom Bench Paint

I need to wipe down the drawer fronts about once a month because they get plenty of shoeprints from being closed with feet and dirty handprints on the handles. I find that a Magic Eraser does the trick for tough spots, along with a quick wipe down using all-purpose spray and a wet cloth. We have just a couple of small chips in the paint and I think within another year they could use a paint touch-up on just the fronts. It would be a really quick and easy one-day project.
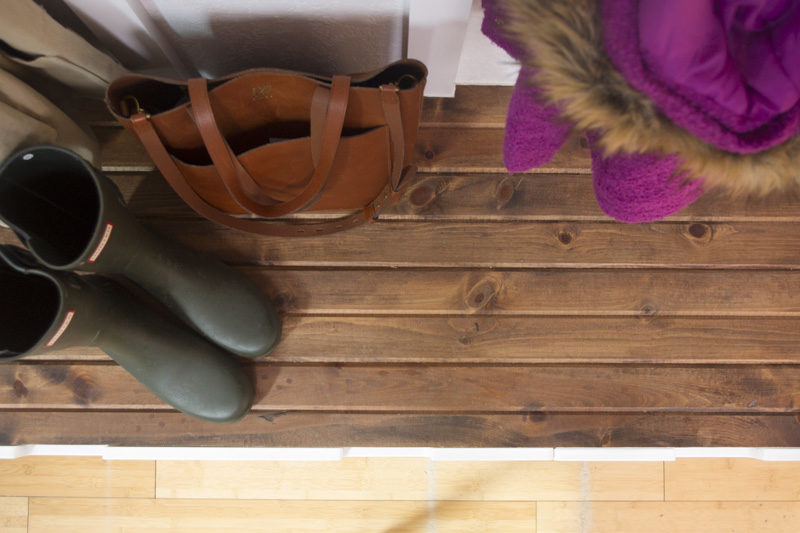
Flooring

Yikes. The floor. This has nothing to do with the drawers, but with the fact that we have bamboo wood flooring, which is very susceptible to wear and dents. Which is why after 3 years, our floors have obvious tracks where the drawers roll out. To be honest, it doesn’t bother me that much. These floors won’t be here forever and they weren’t in great condition to begin with. I could probably do some research and find a way to refinish the color where the tracks have worn them, but I haven’t cared enough to do it!

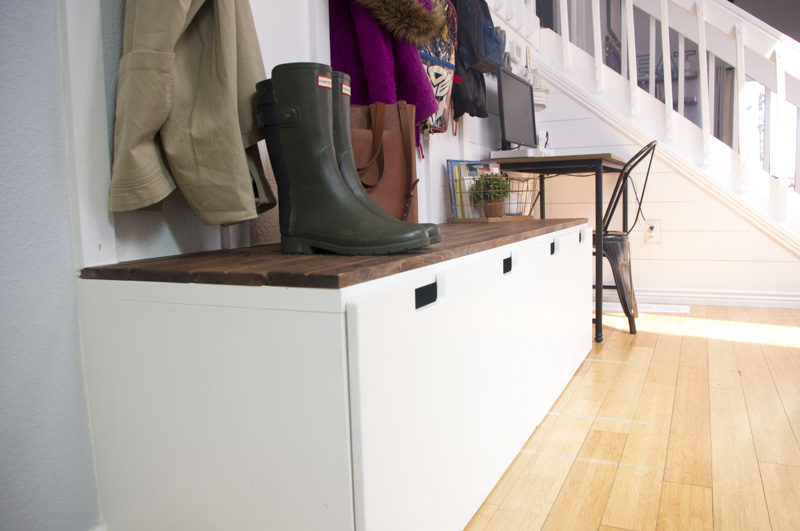
Wooden Mudroom Bench Top

Just like new! It has held up beautifully and still looks amazing. I vacuum it off from time to time so I can get dirt and dust out of the grooves, but other than that I haven’t done any maintenance.
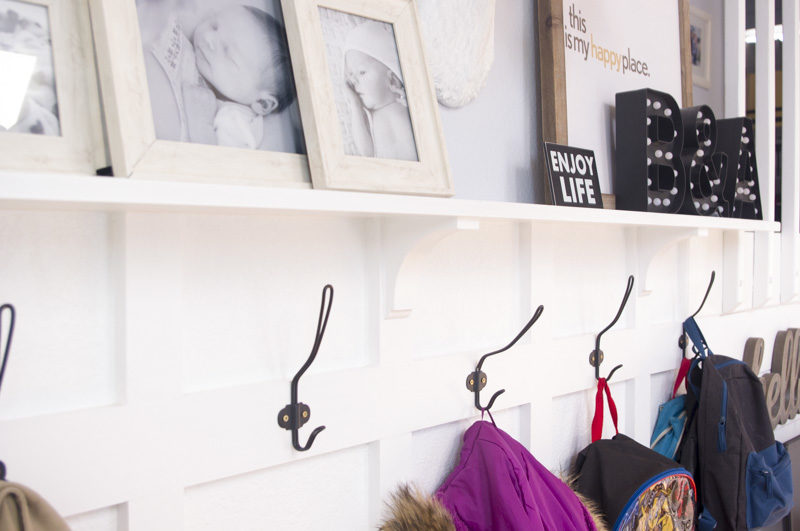
Mudroom Area Hooks

Still great! We bought our hooks for $2.99 at IKEA and they are awesome. They hold heavy coats and heavy backpacks all year long. My daughter’s hook has been bent because she chose to pull down on her backpack in order to pull herself up on top of the bench every day for quite a while before I noticed… (you can quickly pick it out in the picture below). It may need to be replaced at some point, but it’s still hanging in there for now and can usually just be pushed back up into place when I notice it’s bent.

mudroom benches, ikea hack, entryway organization, DIY mudroom, DIY entryway organization

Overall, in 2 years time with 3 kids under the age of 8, we have managed to keep our mudroom area looking pretty good. I can’t imagine it will be going anywhere anytime soon. The fact that everything is screwed into the wall and connected to other pieces of the total bench has kept it incredibly sturdy.

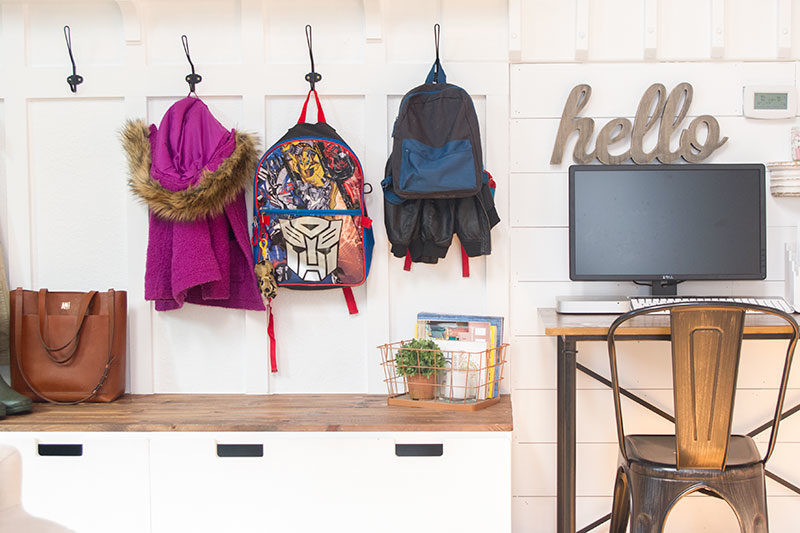
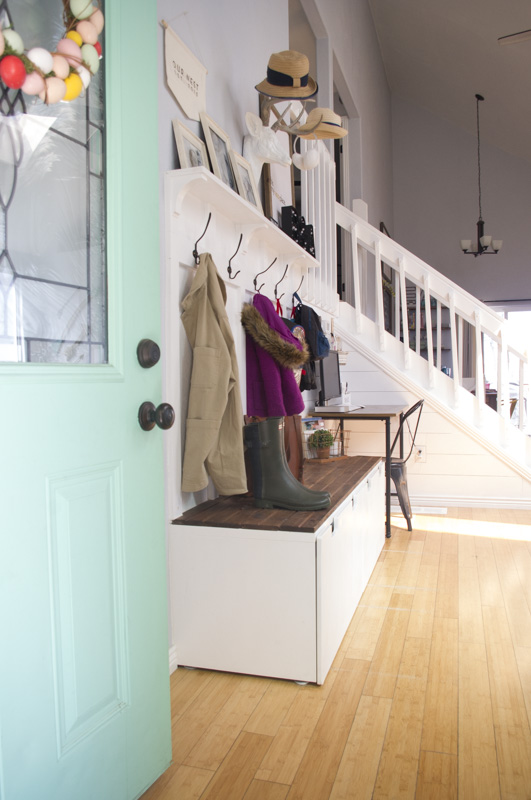
Changes Made since 2015

We have made some changes in the surrounding areas, like adding a desk with a computer to the right (it’s the perfect little space for it!) and I painted the front door a bright, cheery color.

mudroom benches, ikea hack, entryway organization, DIY mudroom, DIY entryway organization

mudroom benches, ikea hack, entryway organization, DIY mudroom, DIY entryway organization

This room continues to be my favorite in the house and it’s where we spend most of our time. Creating a clutter-free home and space that you love is so critical to enjoying where you live! If you’re feeling bogged down by “stuff,” I would definitely recommend creating an organized area where you can store it all.

Get the tutorial

In case you missed it, you can find the original IKEA mudroom hack tutorial here or you can purchase the book, which gives a little more detail than my post!

Disclaimer: some affiliates links used in this post, which means I receive a small commission on any items purchased

Related posts:

  1. Ikea Hack: DIY Mudroom Benches
  2. DIY Outdoor Boot Rack
  3. Backyard Patio Makeover
  4. Modern Farmhouse Bathroom

Filed Under: crafting, home Tagged With: DIY, home, home tour, ikea

  • Email
  • Facebook
  • Instagram
  • Pinterest
  • RSS
  • Twitter

HI! I'M AMY.

I'M A BLOGGER, GRAPHIC DESIGNER, MOM, COFFEE ADDICT, DIYER, CHRONIC MULTITASKER AND STRESSCASE, A COOK AND A LOVER OF A GOOD GLASS OF WINE.
LEARN MORE ABOUT ME

Shop My Paper Line:

Favorites:

Instagram:

I get it. It's a little weird. But the girls I've I get it. It's a little weird.
But the girls I've seen do it best, look adorable.

I think it looks best with an oversized tee or sweatshirt, tennies or slides, and a small crossbody bag.

You can't argue with comfort.

For the record, these are women's sleep shorts that I've had a couple of years from Old Navy. If you buy actual men's boxers, you might consider sewing up the pee pocket 😜

Don't spend a lot on this trend; these shorts are made from the thinnest of fabric and shouldn't cost much. Don't be fooled by a retailer that wants you to spend just because it's trendy.

But if you see some cute boxers and want to give it a go - then do! Bonus - if/when the trend ends, you'll have pajamas on the ready 👏

It's solid weekend wear, but I'm not going out to dinner in it...

#boxershortsforgirls #boxershort #ootd #womensfashion #styleinspiration
Another project down in my son's room! I knew I w Another project down in my son's room!

I knew I wanted some sort of built-in feature in this bedroom, but it was hard to figure out what, because we turned it into an active space where he could run and play and needed a lot of room.

So I settled on a built-in bookcase with the slatted design feature, which I'm in love with!

The best part about it is that if he ever decides to upgrade his bed, the space will also accommodate a full or queen size bed going in the opposite direction. It adds so much interest to this room and hopefully will be here for a long time!

One of the things I love most about DIY projects is figuring out how to make something - it's like a giant puzzle. I saw photos of these slotted wall room dividers on Pinterest and just figured it out as I went. All in all, I had very few hiccups and it only took me a few hours to put together. I think I only cursed once?!? And so I call that an extreme DIY win...

Now that the sports wall, the climbing wall, and the built-in feature are complete, the last thing to do in here is some additional painting. I'm thinking of using a contrasting blue color for the closet doors and back side of the built-in, and perhaps trimming out the window with it as well. Then I need to switch out the light for a fan and this.room.is done 🙌

Details: I used two IKEA billy bookshelves, screwed together and secured to the wall. Then wrapped them in white oak plywood. I ripped down 2x4s into 1.5x1.5" square dowels (heavily sanded!) and used pocket holes on the back side of each to secure to the bookshelf and the 1x4 in the ceiling. It's very sturdy!

Go back in my reels to see the other projects from this room! 

#diy #boysroom #roomrenovation #roomrefresh #kidsrooms #climbingwall #soccerbedroom #builtins #bedroomredo #girlswhobuild
This climbing wall took half a day and cost under This climbing wall took half a day and cost under $100!

We are lucky enough to have 13' ceilings in our bedrooms, so a climbing wall seemed to make sense in my son's room as we worked on the remodel.

He is a super active kid with #ADHD, so his room redo has involved lots of activity spaces! Go back in my reels to see past projects and follow to see me finish this up!

#diy #roomrenovation #roomrefresh #kidsrooms #climbingwall #soccerbedroom
Another to-do checked off my list for spring break Another to-do checked off my list for spring break room makeover!

I added very subtle striping to the wall to mimic a soccer field and keep things classy. ⚽

Stick around to see the next project - a climbing wall!

(And go back in my reels to see the sports wall)

#roommakeover #soccer #kidsroom

Popular Posts:

Ikea Hack: DIY Mudroom Benches
Felt Food Patterns (Link Love)
Babyproofing the stair railings with plexiglass
DIY Outdoor Boot Rack

Recent Posts

  • Functional and Stylish Small Entryway Ideas for a Welcoming Space
  • Pendant & Accent Lights Under $100
  • DIY Stenciled Concrete Floors: Laundry Room Update Part 1
  • First Day and Last Day of School Questionnaire (free printables)
  • How to Create Canvas Wall Art from Digital Photos

>> ABOUT ME
>> DISCLOSURE STATEMENT
>> CONTACT ME

Copyright © 2025 themombot.com
Terms of Service // Privacy Policy