• The Mombot
  • Gift Guides
  • My Story
  • Food & Drink
  • Life
  • Home
  • DIY
  • Mama Style
  • Shop

The Mombot

Motherhood Simplified.

Our Antique Farmhouse Table & Chairs

January 13, 2016 | 1 Comment

Ever since we moved into our house in April 2015, I have wanted a new dining room table and chairs. Not only had my taste significantly changed from when we first purchased our modern-styled set some 4 or 5 years ago, but it really didn’t fit the space available in our new house.

Our table was great; very sturdy and sizable, but far too wide. We don’t have an actual dining room, because our main floor has an open floor plan between the living room, kitchen and dining area. And because we added an island to our kitchen (see pictures), we really needed something narrow so that we had ample walking room and so the chairs could actually pull out without hitting the railing.

I thought the perfect solution was to buy an old round pedestal table – you know, one of those ones from the nineties that come in a lovely oak finish – then I would sand it all down and stain the top dark and paint the pedestal white. Sort of like this blogger did:

white-pedestal-table

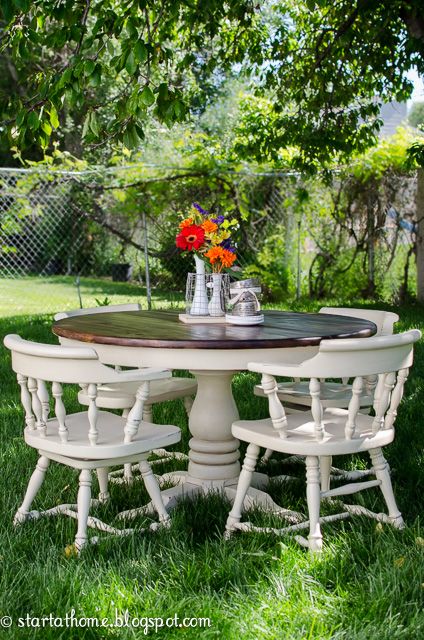
I actually tried to purchase two different ones second-hand online, but both sales fell through. I didn’t know at the time, but it was kismet. Because lo and behold, one day I was walking around a local antique shop and found a round pedestal farm table from the early 1900s for $195 and fell in love. The dark stain and natural scratches from years of wear were unparalleled and so worth the money. I didn’t have the funds to purchase it at the time, so I walked away and kept dreaming.

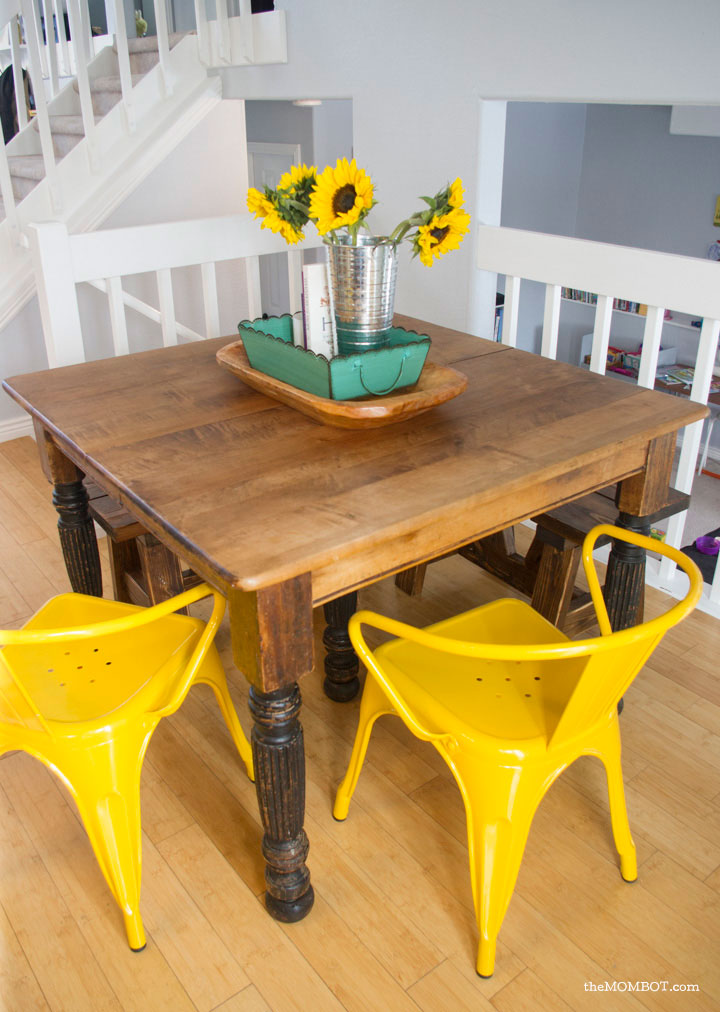
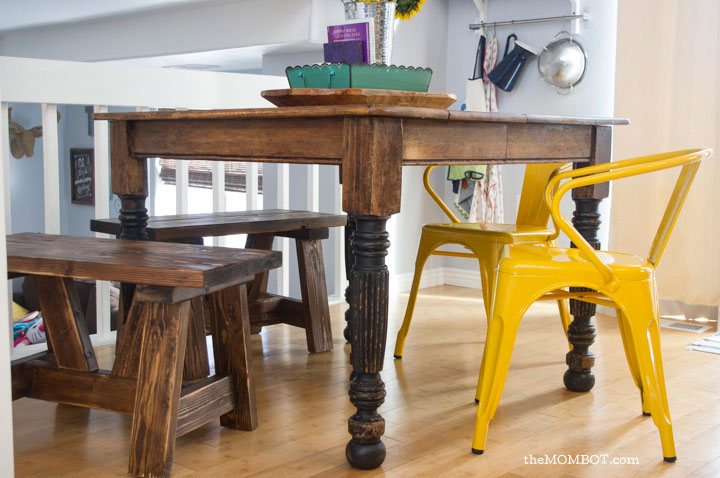
When I did finally have the funds a couple of weeks ago, I went to get it and ended up walking away with a completely different table (hello, indecisive)… this one was actually square and had black legs. Not the plan, not the plan at all. But oh, this table. The finish was gorgeous, the cracks in the top had so much character and the legs were so perfectly distressed. It no longer had the existing leaf(s), but it stretched to about 3 times it’s length (no joke) and I figured we could easily fashion something to work as a leaf if we ever wanted the option to expand it.

_IGP3846

_IGP3831_1

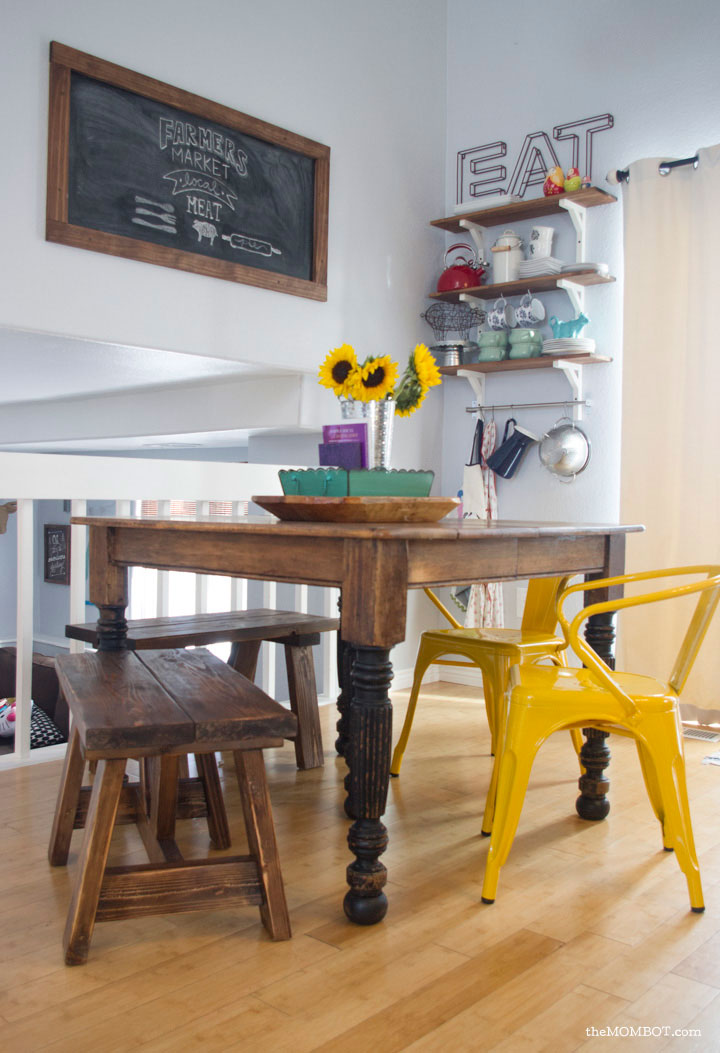
I knew the best way to make this table work for our space was to have two benches that would slide underneath the table; this way we could save space when no one was sitting at it and stop having walk-by toe stubbings due to chairs sticking out. I had pinned some DIY benches you could make for under $20 (from Ana White, of course) many moons ago and planned to make two smaller versions using these free plans. I also purchased two yellow tolix chairs for a crazy good price ($68 each) on overstock.com for the other two sides of the table (swoon).

The result was pretty fantastic. It took some serious mathematics to figure out how to scale the original bench plans down from 52 inches long to just 29.5 inches, and then I had to try and figure out how to stain them to match the table. After the staining, came lots of distressing with the sander, a screwdriver, and some nails. In the end, I was so pleased with the outcome. They don’t match perfectly, but it’s close enough to look like they belong. And those yellow chairs are just, well, amazing.

_IGP3834

_IGP3828_1

We ran into one more slight hiccup… this table (likely from the 1910s-1920s) used to sit atop casters. The casters were no longer attached, which meant the table was about an inch and a half too low. I wasn’t able to cross my legs when sitting at it, which really bothered me (I’m such a lady, after all).

I didn’t particularly want casters on it anyway, so instead of trying to replace them, I bought some wooden bun feet from Home Depot for $9 a piece, painted them black and then distressed the crap out of them. If you had seen me going at them in the garage, you would have thought I was crazy. I used screws, nails, a screwdriver, sand paper, a pocket knife, a wire brush and a handheld planer to try and make these bun feet look 100 years old. After I tore the paint off from distressing, I stained the natural wood with a honey stain that closely matched the table. They certainly don’t look as perfectly reliqued as the rest of the legs, but they do blend in enough to not be noticeable additions, don’t you think? (humor me)

_IGP3835

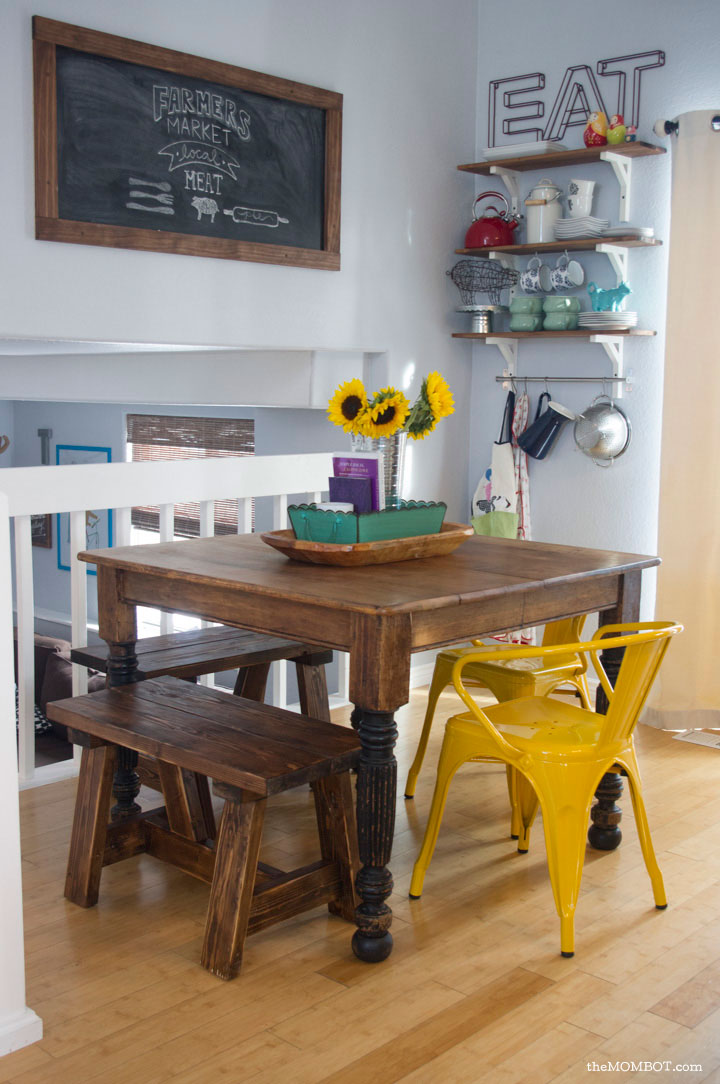
It was a labor of love and another project marked off the list. I love the farmhouse feel that this newly redone dining space brings to our home and I love that these pieces are altogether old, handcrafted, and new. I wish I knew the story behind this table and just how many meals have been served on it. And how that giant crack on one side came to be. And where a huge chunk of the front right leg ended up.

We are creating a home with each piece we bring into this house and it fills me with such joy!

_IGP3841_1

Related posts:

  1. Ikea Hack: DIY Mudroom Benches
  2. A simple IKEA hack: Painted Bathroom Cart
  3. Vintage Pantry Door
  4. What a difference a handle makes

Filed Under: crafting, home Tagged With: DIY, home tour

  • Email
  • Facebook
  • Instagram
  • Pinterest
  • RSS
  • Twitter

HI! I'M AMY.

I'M A BLOGGER, GRAPHIC DESIGNER, MOM, COFFEE ADDICT, DIYER, CHRONIC MULTITASKER AND STRESSCASE, A COOK AND A LOVER OF A GOOD GLASS OF WINE.
LEARN MORE ABOUT ME

Shop My Paper Line:

Favorites:

Instagram:

I get it. It's a little weird. But the girls I've I get it. It's a little weird.
But the girls I've seen do it best, look adorable.

I think it looks best with an oversized tee or sweatshirt, tennies or slides, and a small crossbody bag.

You can't argue with comfort.

For the record, these are women's sleep shorts that I've had a couple of years from Old Navy. If you buy actual men's boxers, you might consider sewing up the pee pocket 😜

Don't spend a lot on this trend; these shorts are made from the thinnest of fabric and shouldn't cost much. Don't be fooled by a retailer that wants you to spend just because it's trendy.

But if you see some cute boxers and want to give it a go - then do! Bonus - if/when the trend ends, you'll have pajamas on the ready 👏

It's solid weekend wear, but I'm not going out to dinner in it...

#boxershortsforgirls #boxershort #ootd #womensfashion #styleinspiration
Another project down in my son's room! I knew I w Another project down in my son's room!

I knew I wanted some sort of built-in feature in this bedroom, but it was hard to figure out what, because we turned it into an active space where he could run and play and needed a lot of room.

So I settled on a built-in bookcase with the slatted design feature, which I'm in love with!

The best part about it is that if he ever decides to upgrade his bed, the space will also accommodate a full or queen size bed going in the opposite direction. It adds so much interest to this room and hopefully will be here for a long time!

One of the things I love most about DIY projects is figuring out how to make something - it's like a giant puzzle. I saw photos of these slotted wall room dividers on Pinterest and just figured it out as I went. All in all, I had very few hiccups and it only took me a few hours to put together. I think I only cursed once?!? And so I call that an extreme DIY win...

Now that the sports wall, the climbing wall, and the built-in feature are complete, the last thing to do in here is some additional painting. I'm thinking of using a contrasting blue color for the closet doors and back side of the built-in, and perhaps trimming out the window with it as well. Then I need to switch out the light for a fan and this.room.is done 🙌

Details: I used two IKEA billy bookshelves, screwed together and secured to the wall. Then wrapped them in white oak plywood. I ripped down 2x4s into 1.5x1.5" square dowels (heavily sanded!) and used pocket holes on the back side of each to secure to the bookshelf and the 1x4 in the ceiling. It's very sturdy!

Go back in my reels to see the other projects from this room! 

#diy #boysroom #roomrenovation #roomrefresh #kidsrooms #climbingwall #soccerbedroom #builtins #bedroomredo #girlswhobuild
This climbing wall took half a day and cost under This climbing wall took half a day and cost under $100!

We are lucky enough to have 13' ceilings in our bedrooms, so a climbing wall seemed to make sense in my son's room as we worked on the remodel.

He is a super active kid with #ADHD, so his room redo has involved lots of activity spaces! Go back in my reels to see past projects and follow to see me finish this up!

#diy #roomrenovation #roomrefresh #kidsrooms #climbingwall #soccerbedroom
Another to-do checked off my list for spring break Another to-do checked off my list for spring break room makeover!

I added very subtle striping to the wall to mimic a soccer field and keep things classy. ⚽

Stick around to see the next project - a climbing wall!

(And go back in my reels to see the sports wall)

#roommakeover #soccer #kidsroom

Popular Posts:

Ikea Hack: DIY Mudroom Benches
Babyproofing the stair railings with plexiglass
Felt Food Patterns (Link Love)
DIY Outdoor Boot Rack

Recent Posts

  • Functional and Stylish Small Entryway Ideas for a Welcoming Space
  • Pendant & Accent Lights Under $100
  • DIY Stenciled Concrete Floors: Laundry Room Update Part 1
  • First Day and Last Day of School Questionnaire (free printables)
  • How to Create Canvas Wall Art from Digital Photos

>> ABOUT ME
>> DISCLOSURE STATEMENT
>> CONTACT ME

Copyright © 2025 themombot.com
Terms of Service // Privacy Policy