• The Mombot
  • Gift Guides
  • My Story
  • Food & Drink
  • Life
  • Home
  • DIY
  • Mama Style
  • Shop

The Mombot

Motherhood Simplified.

DIY pillowcases for Grandma & Grandpa

January 18, 2016 | 1 Comment

I always like to give at least one handmade gift from the kids to our parents for Christmas. But how many coasters with my kids’ faces plastered on them do they really need? So I try to find some out of the box gifts to create for them that they might actually enjoy (like some of these past ideas).

This year, I came across a great idea for an “i love you” pillowcase for Father’s Day from MamaPapaBubba.com and thought a pair for Grandma and Grandpa would be too cute. I knew it would be easy to do with the kids and something the grandparents would treasure (and likely enjoy showing off). And since both sets of grandparents live a few states away, it might be a nice reminder that they are loved from afar.

i-love-you-pillowcases

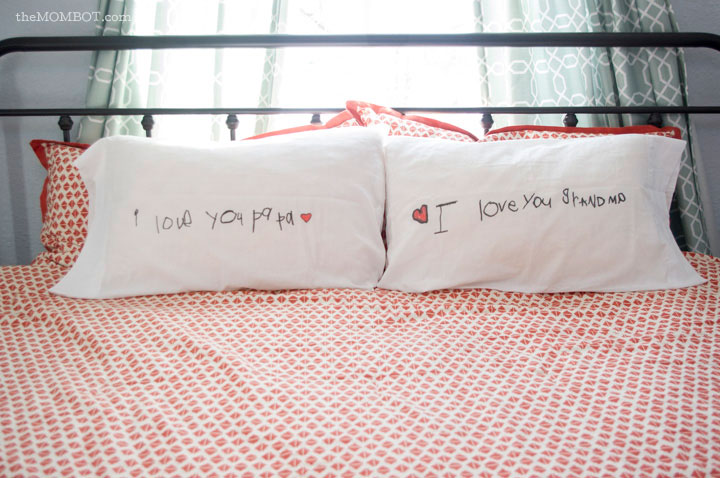
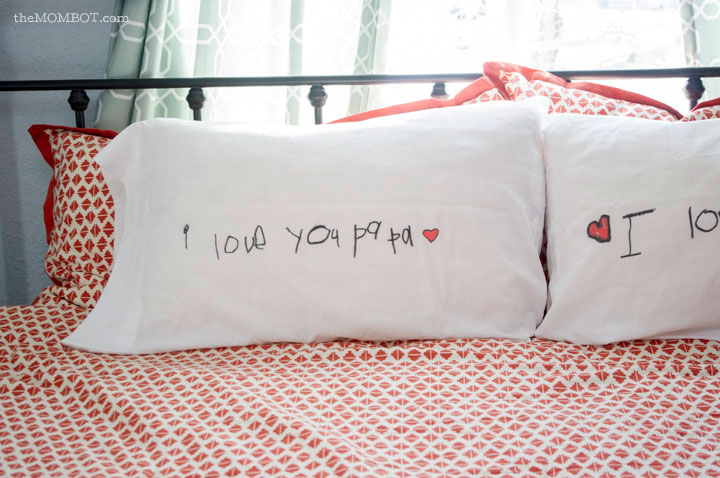
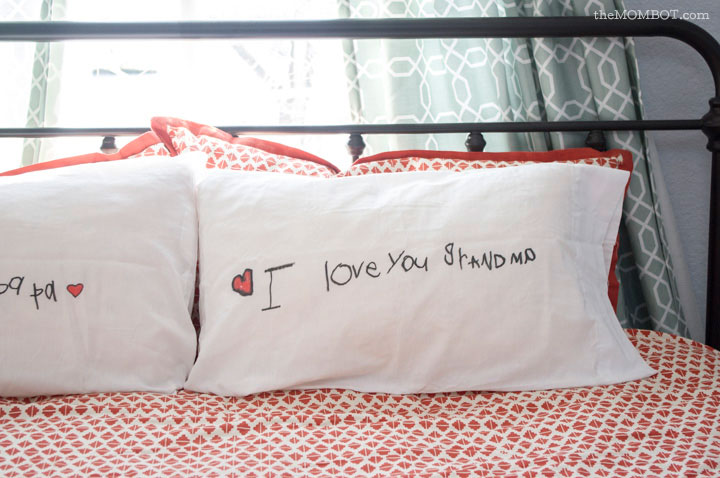
So I had Mia and Lincoln each write one – an “I love you grandma” and “I love you papa” pillowcase. I wrote it out for them first on a piece of paper and then had them copy it in their own handwriting with pencil on the pillowcase. Then I traced over it with the fabric marker. It was so simple and the grandparents loved them! The inconsistencies in their handwriting are my favorite part, and I think my three year old’s writing (on the “I love you papa” pillow) is pretty stellar, but hey, that’s just me.

i-love-you-pillowcase-papa

i-love-you-pillowcase-grandma

You could recreate this for just about anyone – moms, dad, grandparents, siblings… Here’s the tutorial if you are interested in making your own.

“I love you” pillowcases for Grandpa and Grandma

i-love-you-pillowcases-flat

Needed:

  • 2 white pillowcases (I got mine at Walmart for under $10)
  • Fabric markers in black and red (I used Tulip brand with a thicker tip)
  • Cardboard to put inside the pillow (the markers will bleed through)
  • Pencil

Instructions:

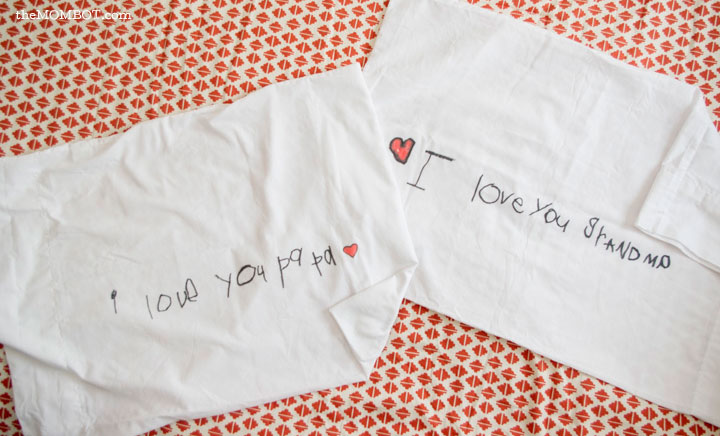
  1. Write the phrase for your pillow to size on a piece of paper. Lay your unwashed pillowcase out on a hard, flat surface and tape your phrase right above where you want the child to write. This will make it easy for them to copy each letter and keep the correct spacing/size. I also taped a blank strip of paper below where I wanted them to write so that they had a designated space to write in and could keep it fairly straight.
  2. Have the child copy your letters in their own handwriting with a pencil. I also had mine turn the pillowcase over when they were done and sign their name and the year in the bottom corner.
  3. Insert cardboard in the pillowcase. Have the child (or yourself) trace over the penciled letters with a blank fabric marker. Go over twice for good saturation.
  4. Let dry for 24 hours. Launder as usual to remove any leftover pencil marks.*

*check the instructions for your fabric marker to make sure they match up with this tutorial. Some fabric markers require heat in order to set, but mine did not – just 24 hours of drying time.

i-love-you-pillowcase-backside

That’s all there is to it! If you have a six year old and you are a type-A like myself, you will likely fight with her over who gets to trace the letters with black marker… it wouldn’t be a craft with kids in my house if someone wasn’t brought to tears.

Related posts:

  1. DIY gifts for kids
  2. DIY gifts for grandparents
  3. Last-minute DIY gift ideas {2012 edition}
  4. End-of-year teacher gift ideas

Filed Under: crafting Tagged With: DIY gifts, DIY gifts for grandparents, for the kids, gift ideas

  • Email
  • Facebook
  • Instagram
  • Pinterest
  • RSS
  • Twitter

HI! I'M AMY.

I'M A BLOGGER, GRAPHIC DESIGNER, MOM, COFFEE ADDICT, DIYER, CHRONIC MULTITASKER AND STRESSCASE, A COOK AND A LOVER OF A GOOD GLASS OF WINE.
LEARN MORE ABOUT ME

Shop My Paper Line:

Favorites:

Instagram:

I get it. It's a little weird. But the girls I've I get it. It's a little weird.
But the girls I've seen do it best, look adorable.

I think it looks best with an oversized tee or sweatshirt, tennies or slides, and a small crossbody bag.

You can't argue with comfort.

For the record, these are women's sleep shorts that I've had a couple of years from Old Navy. If you buy actual men's boxers, you might consider sewing up the pee pocket 😜

Don't spend a lot on this trend; these shorts are made from the thinnest of fabric and shouldn't cost much. Don't be fooled by a retailer that wants you to spend just because it's trendy.

But if you see some cute boxers and want to give it a go - then do! Bonus - if/when the trend ends, you'll have pajamas on the ready 👏

It's solid weekend wear, but I'm not going out to dinner in it...

#boxershortsforgirls #boxershort #ootd #womensfashion #styleinspiration
Another project down in my son's room! I knew I w Another project down in my son's room!

I knew I wanted some sort of built-in feature in this bedroom, but it was hard to figure out what, because we turned it into an active space where he could run and play and needed a lot of room.

So I settled on a built-in bookcase with the slatted design feature, which I'm in love with!

The best part about it is that if he ever decides to upgrade his bed, the space will also accommodate a full or queen size bed going in the opposite direction. It adds so much interest to this room and hopefully will be here for a long time!

One of the things I love most about DIY projects is figuring out how to make something - it's like a giant puzzle. I saw photos of these slotted wall room dividers on Pinterest and just figured it out as I went. All in all, I had very few hiccups and it only took me a few hours to put together. I think I only cursed once?!? And so I call that an extreme DIY win...

Now that the sports wall, the climbing wall, and the built-in feature are complete, the last thing to do in here is some additional painting. I'm thinking of using a contrasting blue color for the closet doors and back side of the built-in, and perhaps trimming out the window with it as well. Then I need to switch out the light for a fan and this.room.is done 🙌

Details: I used two IKEA billy bookshelves, screwed together and secured to the wall. Then wrapped them in white oak plywood. I ripped down 2x4s into 1.5x1.5" square dowels (heavily sanded!) and used pocket holes on the back side of each to secure to the bookshelf and the 1x4 in the ceiling. It's very sturdy!

Go back in my reels to see the other projects from this room! 

#diy #boysroom #roomrenovation #roomrefresh #kidsrooms #climbingwall #soccerbedroom #builtins #bedroomredo #girlswhobuild
This climbing wall took half a day and cost under This climbing wall took half a day and cost under $100!

We are lucky enough to have 13' ceilings in our bedrooms, so a climbing wall seemed to make sense in my son's room as we worked on the remodel.

He is a super active kid with #ADHD, so his room redo has involved lots of activity spaces! Go back in my reels to see past projects and follow to see me finish this up!

#diy #roomrenovation #roomrefresh #kidsrooms #climbingwall #soccerbedroom
Another to-do checked off my list for spring break Another to-do checked off my list for spring break room makeover!

I added very subtle striping to the wall to mimic a soccer field and keep things classy. ⚽

Stick around to see the next project - a climbing wall!

(And go back in my reels to see the sports wall)

#roommakeover #soccer #kidsroom

Popular Posts:

Ikea Hack: DIY Mudroom Benches
Felt Food Patterns (Link Love)
Babyproofing the stair railings with plexiglass
DIY Outdoor Boot Rack

Recent Posts

  • Functional and Stylish Small Entryway Ideas for a Welcoming Space
  • Pendant & Accent Lights Under $100
  • DIY Stenciled Concrete Floors: Laundry Room Update Part 1
  • First Day and Last Day of School Questionnaire (free printables)
  • How to Create Canvas Wall Art from Digital Photos

>> ABOUT ME
>> DISCLOSURE STATEMENT
>> CONTACT ME

Copyright © 2025 themombot.com
Terms of Service // Privacy Policy