Last week I talked about how to organize your digital photos in 5 simple steps. This week, I’m walking into the kitchen for a new organization project… I’m finally tackling my recipes.
My recipes have long been a complete MESS.
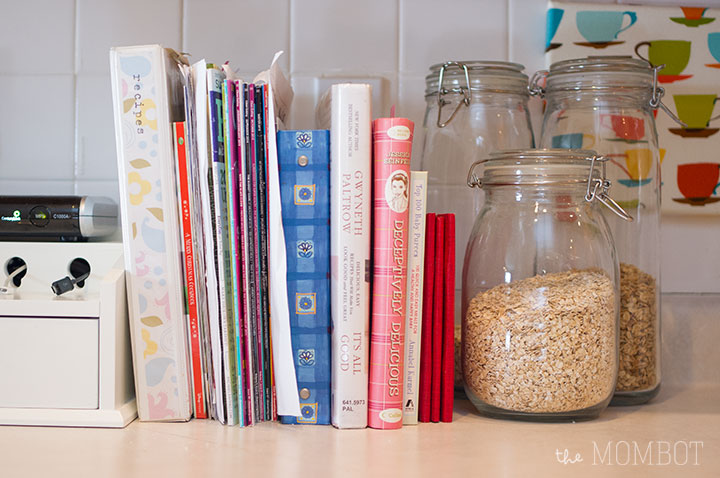
I cook probably 5-6 nights a week and I rely heavily on my recipe binder and some of my favorite cookbooks. Some I use frequently, some are waiting to be tested, and some only get pulled out every once in a while. But regardless of the frequency, it’s good to always have them accessible – which is why I keep them on the counter instead of tucked away in a cupboard. But the mess makes my counter feel cluttered and ugly, and so it was time for a change.
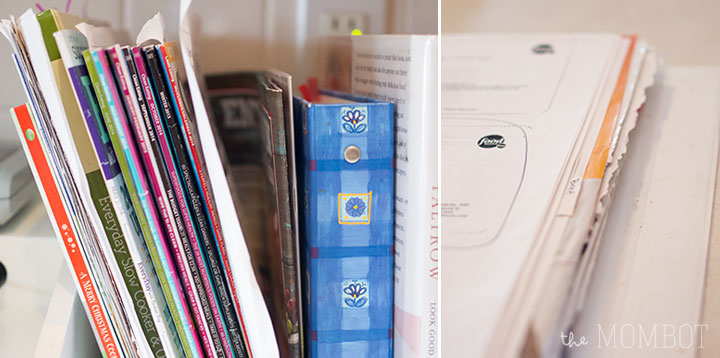
I subscribe to Clean Eating magazine and Rachael Ray Everyday (both I highly recommend and love), so I pull a lot of recipes out of magazines. I’ve also been printing a lot of recipes off of Pinterest.
For a while now, I have kept this collection of recipes in a binder, but you and I know that those flimsy magazine pages gets ripped quickly and don’t stand the test of time in a 3-ring binder. Which is why it looked like a hot mess.
In the effort to find a solution, I began searching for ideas and was thinking about keeping the binder system and putting all my magazine recipes in clear sleeves – which I wasn’t really loving the idea of because then I would have to buy sleeves and slip each and every one inside (ain’t nobody got time for that).
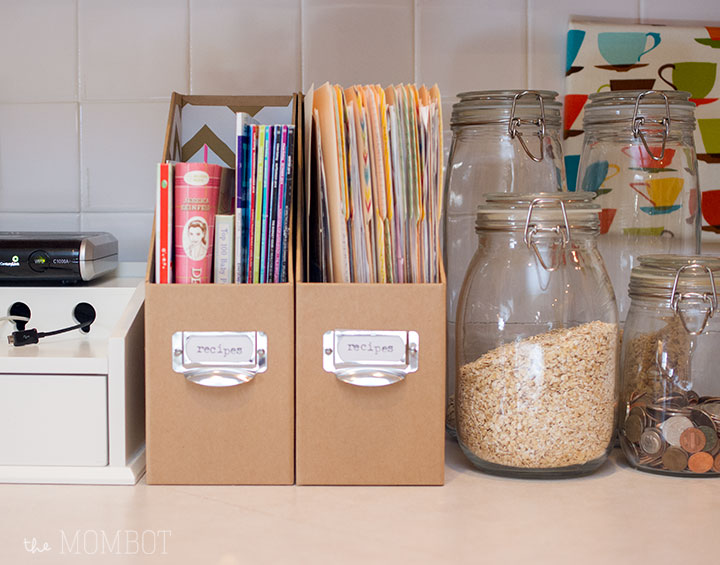
Then I came across the folder idea (categorize your recipes and slip them into manilla folders held in a magazine file) and I was hooked. It’s genius! No need to three hole punch, you can pull out your recipes that you’ll be using for the week and easily file them back away later (without any fear of accidentally ripping punched holes) and all the odd sizes and paper types would fit right into the manilla folder. The magazine file keeps it all neatly contained so no more counter clutter. Plus, it gives me plenty of space to add more recipes in the future and it will be easy to maintain my collection and toss any that I don’t end up liking (at least, that’s the hope…).
I ran to Target for supplies and put together my folder system quickly. Aside from categorizing/organizing your actual recipes, the set-up portion for this project takes about 15 minutes. I then spent about two hours cleaning out my recipes – tossing the ones I knew I didn’t like or would never try and those that don’t fit into our “clean eating” lifestyle anymore – and putting everything into categories. Luckily I did this during “The Bachelor” so it didn’t seem like a chore at all (thank you, Chris Soules – *wink*).
Here’s how to put together your own recipe filing system:
Supplies:
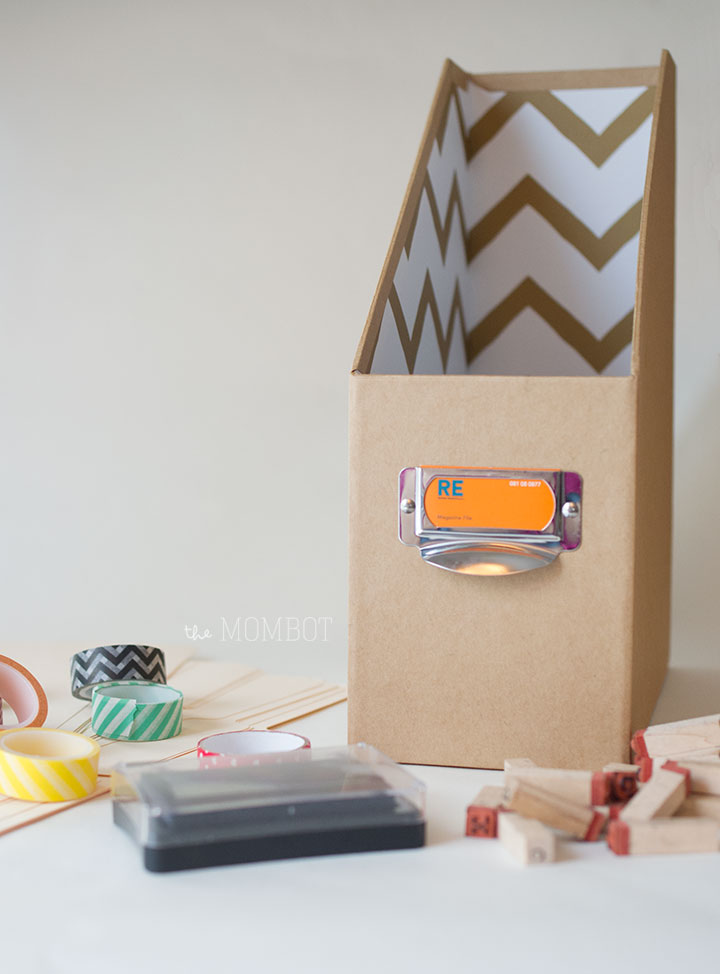
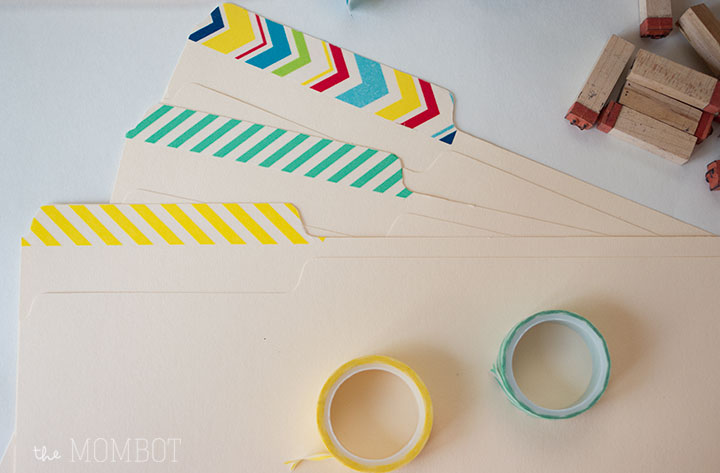
- Washi tape
- Scissors
- Manilla folders (ones with tabs at the top and middle, bottom tab folders won’t be seen)
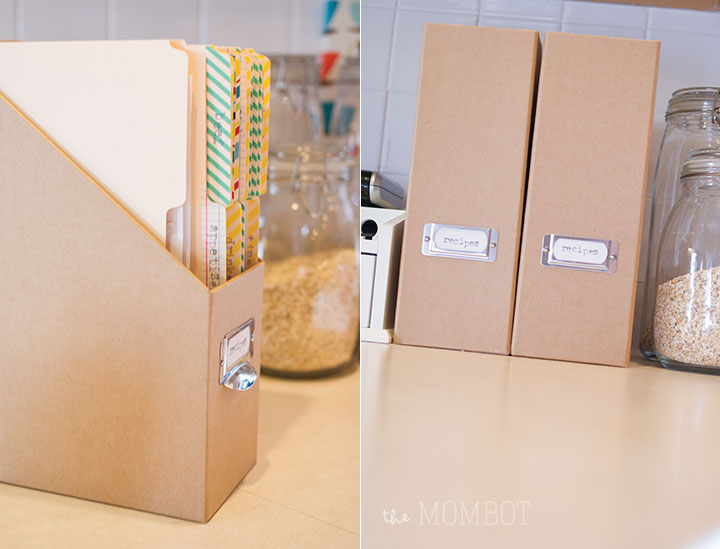
- Magazine files
- Stamps/stamp pad or a label maker (or good old fashioned handwriting will work too)
How to:
1. Cover your file folder tabs with washi tape (I realized after I started that light colors and simple patterns work best since you’ll be writing on top of them). Trim off any excess from the edges with scissors.
2. Organize your recipes into categories (I had a ton by the time I finished: Poultry, Fish, Beef, Vegetarian, Sides & Sauces, Soups, Salads, Breads, Snacks, Desserts, Kid-Friendly, Breakfast, Appetizers, Drinks and “Tips” – for miscellaneous cooking tips that I’ve pulled out of magazines).
3. Stamp, write or label each of your folders with the categories you decided on.
4. Stuff your folders and alphabetize them (if you’re into that sort of thing – I feel like it will make it easier to find the folder I need if it’s in order).

4. Slip into your magazine file and you’re done!
I bought a second magazine file to put my most-used recipe books and magazines in, too. I love that I can turn the holders backwards if I don’t want to see everything and my counter instantly looks cleaner and more organized. Grabbing a recipe is simple and I don’t have pages falling out everywhere while I’m looking for something – what a relief.

Bam. Take that 2015. Another organization task complete!