• The Mombot
  • Gift Guides
  • My Story
  • Food & Drink
  • Life
  • Home
  • DIY
  • Mama Style
  • Shop

The Mombot

Motherhood Simplified.

Babyproofing the stair railings with plexiglass

September 6, 2013 | Leave a Comment

Babyproofing stair railings with plexiglass | TheMombot.com

You might remember my post a few weeks ago about ways to stylishly babyproof the home, particularly the stairs.

I searched the web to find ways to babyproof our odd banisters and stairs, because conventional baby gates weren’t working and the previous tenants had come up with some really unattractive options.

That’s what led to these red baby gates that I made from a $30 door purchased at Home Depot.

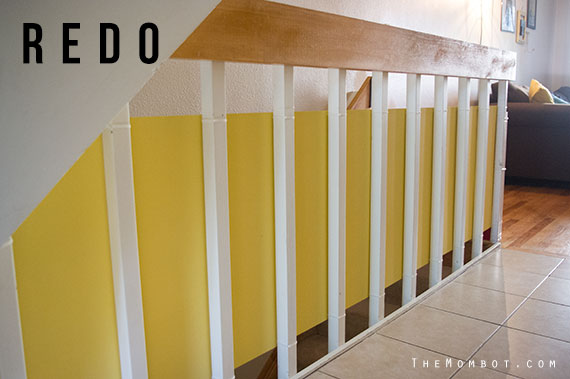
When it came to the space between the railings, I was all set to use the Clear KidKusion Banister Guard (and had actually already purchased it from Amazon), until I ran across poster-size sheets of plexiglass at Hobby Lobby for only $6 each (say what??). I had been trying to find affordable plexiglass because I really wanted to recreate something like the pricey railing guard shown in this post, but I kept coming up empty.

So I purchased 4 sheets of plexiglass from Hobby Lobby, along with some frosted glass spray because I really wanted them to be opaque (I felt like it would up the style factor a bit, plus you wouldn’t be able to see the inevitable smears and kid saliva). The total price was cheaper than the Banister Guard, which made me do a little happy dance.

I tested the glass spray on the plexiglass and it seemed to work fine, so I went ahead and sprayed the remaining sheets. But as I started, I realized it was really hard to keep the frosted look even, and there were weird streaks showing up on the plexiglass. I’m not sure what caused this, other than to guess it’s just what happens whey you spray a glass spray on plexiglass, which is… not glass.

Anyway, I cried a little on the inside when they were done because they looked kind of crappy. I felt like a DIY failure (much like my baby gate project), but decided to make the best of it; after all, the money had already been spent. We forged ahead and my husband and I starting hanging them on the railings. I already knew I wanted to hang them in the middle of the railing (vertically speaking), because it adds a little more visual interest than if they were flush with the ground.

Babyproofing stair railings with plexiglass | TheMombot.com

We couldn’t drill into the railings like I would have preferred because we rent, and also because they are made of steel. So instead, we used clear zip ties (purchased in the $1 section at Target, no less!) to attach the plexiglass to each railing. We held the sheets up to the railings and marked where we needed holes for the zip ties, then held the plexiglass down on top of a piece of wood and drilled the holes. Luckily, the sheets of plexiglass fit perfectly between our railings (meaning a whole sheet started and ended behind a railing, so matching them up and hanging them was easy).

Babyproofing stair railings with plexiglass | TheMombot.com

When all was said and done, I wasn’t too upset over how they looked. You can still see the streakiness and it’s kind of blotchy, but it’s bearable. I am still researching ways to fix it and make it less noticeable.

But the most important thing is that it keeps our kiddos safe. They were interested in the guard at first, but now they never touch it. If you had a child who was constantly banging up against them, you might want to go with the plastic KidKusion Banister Guard instead, because plexiglass does crack with enough pressure. In hindsight, I think we also should have put zip ties through the middle of the plexiglass sheets for added support, instead of just the top and bottom. I may still go back and do that.

All in all, it looks WAY better than the black plastic netting that was there when we moved in and I am generally happy with the results! Not a total DIY success, but not a complete failure either – and I’m ok with that.

/////  U  P  D  A  T  E  /////

08.15.14  We recently figured out a sturdier and perhaps more attractive way to babyproof our stairs. Check it out here:

stylishly babyproofing stair railings

Related posts:

  1. Baby boy nursery
  2. Stylishly babyproofing your stairs and home
  3. DIY baby gates from a door (learn from my mistakes)
  4. Stylish staircase babyproofing: An update

Filed Under: crafting Tagged With: baby, home

  • Email
  • Facebook
  • Instagram
  • Pinterest
  • RSS
  • Twitter

HI! I'M AMY.

I'M A BLOGGER, GRAPHIC DESIGNER, MOM, COFFEE ADDICT, DIYER, CHRONIC MULTITASKER AND STRESSCASE, A COOK AND A LOVER OF A GOOD GLASS OF WINE.
LEARN MORE ABOUT ME

Shop My Paper Line:

Favorites:

Instagram:

I get it. It's a little weird. But the girls I've I get it. It's a little weird.
But the girls I've seen do it best, look adorable.

I think it looks best with an oversized tee or sweatshirt, tennies or slides, and a small crossbody bag.

You can't argue with comfort.

For the record, these are women's sleep shorts that I've had a couple of years from Old Navy. If you buy actual men's boxers, you might consider sewing up the pee pocket 😜

Don't spend a lot on this trend; these shorts are made from the thinnest of fabric and shouldn't cost much. Don't be fooled by a retailer that wants you to spend just because it's trendy.

But if you see some cute boxers and want to give it a go - then do! Bonus - if/when the trend ends, you'll have pajamas on the ready 👏

It's solid weekend wear, but I'm not going out to dinner in it...

#boxershortsforgirls #boxershort #ootd #womensfashion #styleinspiration
Another project down in my son's room! I knew I w Another project down in my son's room!

I knew I wanted some sort of built-in feature in this bedroom, but it was hard to figure out what, because we turned it into an active space where he could run and play and needed a lot of room.

So I settled on a built-in bookcase with the slatted design feature, which I'm in love with!

The best part about it is that if he ever decides to upgrade his bed, the space will also accommodate a full or queen size bed going in the opposite direction. It adds so much interest to this room and hopefully will be here for a long time!

One of the things I love most about DIY projects is figuring out how to make something - it's like a giant puzzle. I saw photos of these slotted wall room dividers on Pinterest and just figured it out as I went. All in all, I had very few hiccups and it only took me a few hours to put together. I think I only cursed once?!? And so I call that an extreme DIY win...

Now that the sports wall, the climbing wall, and the built-in feature are complete, the last thing to do in here is some additional painting. I'm thinking of using a contrasting blue color for the closet doors and back side of the built-in, and perhaps trimming out the window with it as well. Then I need to switch out the light for a fan and this.room.is done 🙌

Details: I used two IKEA billy bookshelves, screwed together and secured to the wall. Then wrapped them in white oak plywood. I ripped down 2x4s into 1.5x1.5" square dowels (heavily sanded!) and used pocket holes on the back side of each to secure to the bookshelf and the 1x4 in the ceiling. It's very sturdy!

Go back in my reels to see the other projects from this room! 

#diy #boysroom #roomrenovation #roomrefresh #kidsrooms #climbingwall #soccerbedroom #builtins #bedroomredo #girlswhobuild
This climbing wall took half a day and cost under This climbing wall took half a day and cost under $100!

We are lucky enough to have 13' ceilings in our bedrooms, so a climbing wall seemed to make sense in my son's room as we worked on the remodel.

He is a super active kid with #ADHD, so his room redo has involved lots of activity spaces! Go back in my reels to see past projects and follow to see me finish this up!

#diy #roomrenovation #roomrefresh #kidsrooms #climbingwall #soccerbedroom
Another to-do checked off my list for spring break Another to-do checked off my list for spring break room makeover!

I added very subtle striping to the wall to mimic a soccer field and keep things classy. ⚽

Stick around to see the next project - a climbing wall!

(And go back in my reels to see the sports wall)

#roommakeover #soccer #kidsroom

Popular Posts:

Ikea Hack: DIY Mudroom Benches
Felt Food Patterns (Link Love)
Babyproofing the stair railings with plexiglass
Free printable Father’s Day questionnaires for dad and grandpa

Recent Posts

  • Functional and Stylish Small Entryway Ideas for a Welcoming Space
  • Pendant & Accent Lights Under $100
  • DIY Stenciled Concrete Floors: Laundry Room Update Part 1
  • First Day and Last Day of School Questionnaire (free printables)
  • How to Create Canvas Wall Art from Digital Photos

>> ABOUT ME
>> DISCLOSURE STATEMENT
>> CONTACT ME

Copyright © 2025 themombot.com
Terms of Service // Privacy Policy