• The Mombot
  • Gift Guides
  • My Story
  • Food & Drink
  • Life
  • Home
  • DIY
  • Mama Style
  • Shop

The Mombot

Motherhood Simplified.

Guest post: Gender reveal craft

October 3, 2011 | 2 Comments

You’re all in for a treat today because my good friend, Michelle, from Just Watching My Garden Grow is here to share with us a tutorial for her recent  gender reveal. Michelle is pregnant with baby #3, and despite being a teacher and taking care of her family, she also finds time to craft on a regular basis; and, she ‘s one of the craftiest ladies I know! So take it away, Michelle…

——

Hi, I’m Michelle from over at Just Watching My Garden Grow, and I’m so excited Amy asked me to tell you about my gender reveal here on The Mombot. Our family is so happy about this pregnancy! We have two little girls, and knew this would be our last addition, so I’ve tried to make every moment very special. My husband took his card to a lunch with some friends and they all drum rolled at the table while the balloons were being blown up. Their excitement about our news was definitely the reaction I was looking for, and it went off without a hitch. Yay! Let’s get on with it, shall we?

gender reveal ideas, baby gender reveal ideas, finding out gender

I began with printing my chosen text onto blank cards I purchased from Michaels (with a coupon, of course, I am The Mombot’s friend after all)!

gender reveal ideas, baby gender reveal ideas, finding out gender

I kicked around some different phrases, but am really happy with what I chose.

Gender reveal DIY idea | TheMombot.com

I took the idea of conveying a message on a balloon from a Mother’s Day card I saw on Pinterest and ran with it!

gender reveal ideas, baby gender reveal ideas, finding out gender

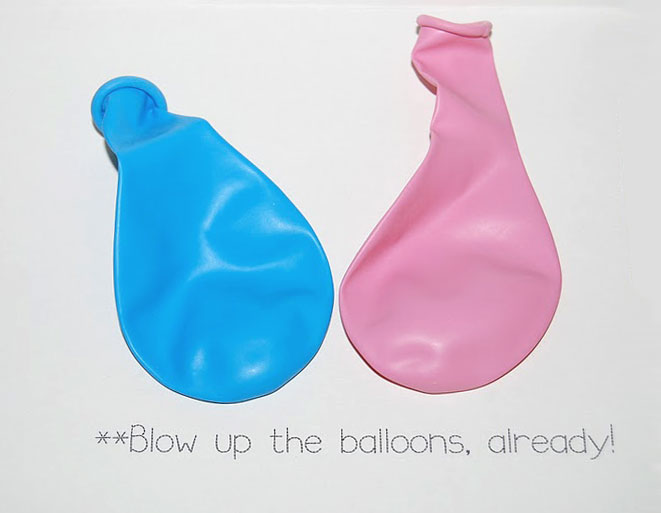
This part was a bit tricky. I blew up the balloons and had my husband hold them, so I could write on them. You can also use a clothespin if you don’t have extra hands nearby. A ball point pen worked the best. I tried a Sharpie, but it was too thick and you could read the words when the balloon was deflated. I accidentally smudged one with the ball point pen, but soon learned that I needed to let it dry for a couple of hours.


gender reveal ideas, baby gender reveal ideas, finding out gender

Be sure you do not write your words too large, or you will see them when the balloon is flat. I made sure to put the balloons in the cards with the words facing down after they were completely dry.

…and that’s it! Have fun giving this idea a try. There are so many events it can be used for.

Thanks, Amy, for letting me share this special moment with your readers. You’re the best!

Smiles,
Michelle


Want more gender reveal ideas?

gender reveal cards, gender reveal
Purchase gender reveal cards in my Etsy shop!

Check out this gender reveal video with free downloads!

Link Parties:

  • Life Made Lovely
  • I Heart Naptime
  • Tip Junkie
  • Hope Studios
  • Lil Luna
  • We are That Family
  • Fingerprints on the Fridge
  • The Shabby Nest

Related posts:

  1. Crayon Roll Tutorial
  2. Gender reveal video & more ideas
  3. DIY bowtie bib
  4. Gender reveal photo shoot… it’s a boy!

Filed Under: crafting Tagged With: baby, gender reveal, guest post, pregnancy, tutorial

  • Pingback: Unique and Fun Baby Gender Reveal Ideas()

  • Pingback: Gender Reveal Ideas - Life with the Rollins'()

  • Email
  • Facebook
  • Instagram
  • Pinterest
  • RSS
  • Twitter

HI! I'M AMY.

I'M A BLOGGER, GRAPHIC DESIGNER, MOM, COFFEE ADDICT, DIYER, CHRONIC MULTITASKER AND STRESSCASE, A COOK AND A LOVER OF A GOOD GLASS OF WINE.
LEARN MORE ABOUT ME

Shop My Paper Line:

Favorites:

Instagram:

I get it. It's a little weird. But the girls I've I get it. It's a little weird.
But the girls I've seen do it best, look adorable.

I think it looks best with an oversized tee or sweatshirt, tennies or slides, and a small crossbody bag.

You can't argue with comfort.

For the record, these are women's sleep shorts that I've had a couple of years from Old Navy. If you buy actual men's boxers, you might consider sewing up the pee pocket 😜

Don't spend a lot on this trend; these shorts are made from the thinnest of fabric and shouldn't cost much. Don't be fooled by a retailer that wants you to spend just because it's trendy.

But if you see some cute boxers and want to give it a go - then do! Bonus - if/when the trend ends, you'll have pajamas on the ready 👏

It's solid weekend wear, but I'm not going out to dinner in it...

#boxershortsforgirls #boxershort #ootd #womensfashion #styleinspiration
Another project down in my son's room! I knew I w Another project down in my son's room!

I knew I wanted some sort of built-in feature in this bedroom, but it was hard to figure out what, because we turned it into an active space where he could run and play and needed a lot of room.

So I settled on a built-in bookcase with the slatted design feature, which I'm in love with!

The best part about it is that if he ever decides to upgrade his bed, the space will also accommodate a full or queen size bed going in the opposite direction. It adds so much interest to this room and hopefully will be here for a long time!

One of the things I love most about DIY projects is figuring out how to make something - it's like a giant puzzle. I saw photos of these slotted wall room dividers on Pinterest and just figured it out as I went. All in all, I had very few hiccups and it only took me a few hours to put together. I think I only cursed once?!? And so I call that an extreme DIY win...

Now that the sports wall, the climbing wall, and the built-in feature are complete, the last thing to do in here is some additional painting. I'm thinking of using a contrasting blue color for the closet doors and back side of the built-in, and perhaps trimming out the window with it as well. Then I need to switch out the light for a fan and this.room.is done 🙌

Details: I used two IKEA billy bookshelves, screwed together and secured to the wall. Then wrapped them in white oak plywood. I ripped down 2x4s into 1.5x1.5" square dowels (heavily sanded!) and used pocket holes on the back side of each to secure to the bookshelf and the 1x4 in the ceiling. It's very sturdy!

Go back in my reels to see the other projects from this room! 

#diy #boysroom #roomrenovation #roomrefresh #kidsrooms #climbingwall #soccerbedroom #builtins #bedroomredo #girlswhobuild
This climbing wall took half a day and cost under This climbing wall took half a day and cost under $100!

We are lucky enough to have 13' ceilings in our bedrooms, so a climbing wall seemed to make sense in my son's room as we worked on the remodel.

He is a super active kid with #ADHD, so his room redo has involved lots of activity spaces! Go back in my reels to see past projects and follow to see me finish this up!

#diy #roomrenovation #roomrefresh #kidsrooms #climbingwall #soccerbedroom
Another to-do checked off my list for spring break Another to-do checked off my list for spring break room makeover!

I added very subtle striping to the wall to mimic a soccer field and keep things classy. ⚽

Stick around to see the next project - a climbing wall!

(And go back in my reels to see the sports wall)

#roommakeover #soccer #kidsroom

Popular Posts:

Ikea Hack: DIY Mudroom Benches
Felt Food Patterns (Link Love)
Babyproofing the stair railings with plexiglass
DIY Outdoor Boot Rack

Recent Posts

  • Functional and Stylish Small Entryway Ideas for a Welcoming Space
  • Pendant & Accent Lights Under $100
  • DIY Stenciled Concrete Floors: Laundry Room Update Part 1
  • First Day and Last Day of School Questionnaire (free printables)
  • How to Create Canvas Wall Art from Digital Photos

>> ABOUT ME
>> DISCLOSURE STATEMENT
>> CONTACT ME

Copyright © 2025 themombot.com
Terms of Service // Privacy Policy