• The Mombot
  • Gift Guides
  • My Story
  • Food & Drink
  • Life
  • Home
  • DIY
  • Mama Style
  • Shop

The Mombot

Motherhood Simplified.

Organizing your digital photos in 5 easy steps

December 31, 2014 | 2 Comments

organizing your digital photos in 5 easy steps | themombot.com

We’re pretty much all in the mood to organize right now, aren’t we? January and the start of a new year can easily do that to you. And because I’ve been bitten by the organization bug, I decided to do a short series this January on organizing different areas in your home and life. Up first? Organizing all those digital photos…

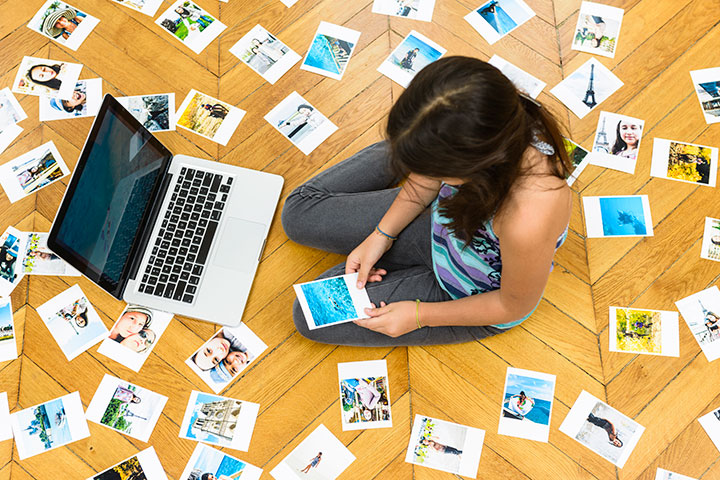
One of my biggest struggles that I think I finally mastered in 2014 was organizing my photos in a way that makes it easy to document the year as the months go on. I’m sure I wasn’t alone in having photos saved all over the place on my computer with no rhyme or reason; not to mention, photos floating around on my phone that desperately needed to be cleaned off but yet remained, taking up space and becoming forgotten.

But I’ve found that if I have a good system in place for how I gather all my photos and organize them, I can find what I need when I need it, and creating photo books or scrapbooks is a breeze.

Here’s my method and how you, too, can organize your photos for 2015:

1. First and most important: Make sure your date is set correctly on your digital camera so you can easily organize the photos by date later!

2. Clean off your phone and consolidate!
Remember to clean the photos (and videos) off your phone every 1-3 months. This is both good for photo organization on your computer and good for maintaining space on your phone! I like to keep a folder on my computer called “iPhone photos” where I dump all the photos from my phone on a regular basis. This helps with keeping all those random shots that may not belong to a specific event in one place (i.e. Instagram!). After you’ve moved them onto your computer, you can also separate the ones out that are for specific events (like birthdays, holidays, etc) and move them into existing folders that already contain pictures from your camera.

3. Edit, Edit, Edit.
When you transfer photos from your camera onto your computer, do an initial edit. Sure, those 17 pictures of your 3 month old smiling are cute, but are you ever going to need all 17? Pick one or two of the best and delete the rest.

organizing your digital photos in 5 easy steps | TheMombot.com

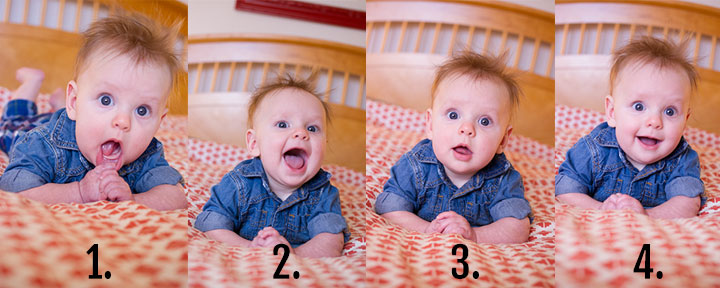
(on second thought, maybe I’ll keep all of these… gosh, he’s cute!)

If you can whittle down each even throughout the year to only the best photos, putting together a photo book won’t seem so daunting because there’s no sorting necessary to find the best shots. Which leads me to photo file organization…

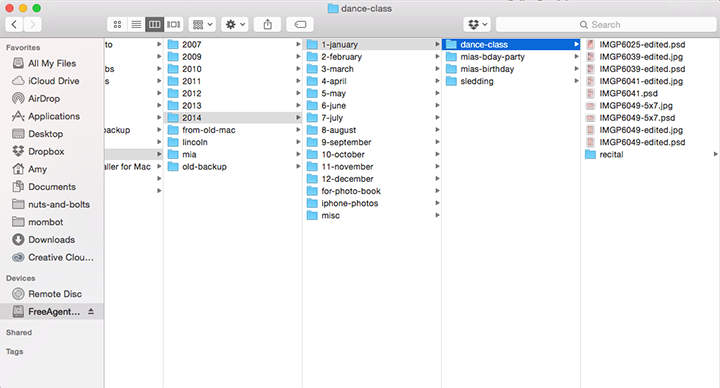
4. File organization on your computer.
If you have a mac, you can use iPhoto to organize your photos. It is simple to create smart folders that can group by date, so all your photos from 2015 can be in one folder organized chronologically. I used to use iPhoto but found that it took up too much space on my hard drive and I had issues with files shot in RAW, which is how I always shoot now. So I started my own filing system instead and found that it works just fine!

The easiest way to do it is to create a folder for the year (i.e. 2015) – see below. Then create subfolders for each month (because I’m OCD, I also put a number in front of each month so that they stay in chronological order instead of alphabetical). Then after each big event, clean off your memory card and create a folder in the correct month for that event. This way, going back and finding a photo is really simple.

organizing your digital photos in 5 easy steps | TheMombot.com

I also keep a “misc” folder for other events that occur throughout the year and don’t fit into one specific month. For instance, I have one for my son Graham that is holding pictures of him for each month of the year so that I can create an album for his first year, and I had one for gathering pictures during my pregnancy, too.

If you want to go one step further and are someone who edits your photos regularly, I read a post where someone suggested creating “keep em” and “share em” folders within each event. The “keep em” folder contains all original photos you want to keep that are high resolution and unedited. The “share em” folder contains images you’ve edited, perhaps downsized and want to print or share. I think this is genius! There are many times that I’ve wanted to go back to the original version of a photo, but no longer had it.

5. Finally: Back-up your photos!
You have several options for backing up your photos, please choose one! I once lost a bunch of photos when my external hard drive pooped out, which included pictures from my daughter’s first birthday (*tear). Thank God I had posted some on my blog and had web versions of them – but I was heartbroken, nonetheless.

Anyway, you have several options for backing up. You can use an external hard drive (you can get 1 TB or larger now for under $100), you can save photos to your cloud (if you are a Mac user), you can save photos to a Dropbox account (though you will probably need to pay a monthly fee if you use a lot of storage), or you can use another online service like CrashPlan (free) or BackBlaze ($5 per month).


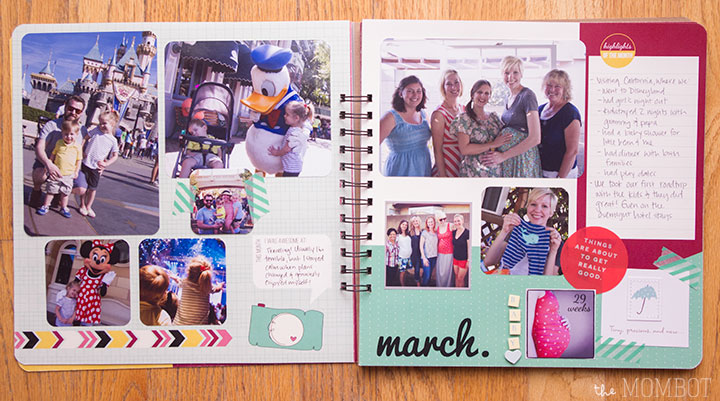
Now that you’re all organized, what are you going to do with all those photos? This is really based on preference, some people love creating digital photo books, some people enjoy doing Project Life and some people still go old school and scrapbook.

I’ll tell you how I did it in 2014 – it totally changed my world. My entire year was documented by December 31, 2014. Read more about it here

Year photo album & journal | TheMombot.com

Related posts:

  1. Link Love: Organization for 2012
  2. My little ballerina
  3. Magnetic photo strip display
  4. Tips for photographing pumpkin carving (and other fun events)

Filed Under: organization Tagged With: photography, scrapbooking

  • Email
  • Facebook
  • Instagram
  • Pinterest
  • RSS
  • Twitter

HI! I'M AMY.

I'M A BLOGGER, GRAPHIC DESIGNER, MOM, COFFEE ADDICT, DIYER, CHRONIC MULTITASKER AND STRESSCASE, A COOK AND A LOVER OF A GOOD GLASS OF WINE.
LEARN MORE ABOUT ME

Shop My Paper Line:

Favorites:

Instagram:

I get it. It's a little weird. But the girls I've I get it. It's a little weird.
But the girls I've seen do it best, look adorable.

I think it looks best with an oversized tee or sweatshirt, tennies or slides, and a small crossbody bag.

You can't argue with comfort.

For the record, these are women's sleep shorts that I've had a couple of years from Old Navy. If you buy actual men's boxers, you might consider sewing up the pee pocket 😜

Don't spend a lot on this trend; these shorts are made from the thinnest of fabric and shouldn't cost much. Don't be fooled by a retailer that wants you to spend just because it's trendy.

But if you see some cute boxers and want to give it a go - then do! Bonus - if/when the trend ends, you'll have pajamas on the ready 👏

It's solid weekend wear, but I'm not going out to dinner in it...

#boxershortsforgirls #boxershort #ootd #womensfashion #styleinspiration
Another project down in my son's room! I knew I w Another project down in my son's room!

I knew I wanted some sort of built-in feature in this bedroom, but it was hard to figure out what, because we turned it into an active space where he could run and play and needed a lot of room.

So I settled on a built-in bookcase with the slatted design feature, which I'm in love with!

The best part about it is that if he ever decides to upgrade his bed, the space will also accommodate a full or queen size bed going in the opposite direction. It adds so much interest to this room and hopefully will be here for a long time!

One of the things I love most about DIY projects is figuring out how to make something - it's like a giant puzzle. I saw photos of these slotted wall room dividers on Pinterest and just figured it out as I went. All in all, I had very few hiccups and it only took me a few hours to put together. I think I only cursed once?!? And so I call that an extreme DIY win...

Now that the sports wall, the climbing wall, and the built-in feature are complete, the last thing to do in here is some additional painting. I'm thinking of using a contrasting blue color for the closet doors and back side of the built-in, and perhaps trimming out the window with it as well. Then I need to switch out the light for a fan and this.room.is done 🙌

Details: I used two IKEA billy bookshelves, screwed together and secured to the wall. Then wrapped them in white oak plywood. I ripped down 2x4s into 1.5x1.5" square dowels (heavily sanded!) and used pocket holes on the back side of each to secure to the bookshelf and the 1x4 in the ceiling. It's very sturdy!

Go back in my reels to see the other projects from this room! 

#diy #boysroom #roomrenovation #roomrefresh #kidsrooms #climbingwall #soccerbedroom #builtins #bedroomredo #girlswhobuild
This climbing wall took half a day and cost under This climbing wall took half a day and cost under $100!

We are lucky enough to have 13' ceilings in our bedrooms, so a climbing wall seemed to make sense in my son's room as we worked on the remodel.

He is a super active kid with #ADHD, so his room redo has involved lots of activity spaces! Go back in my reels to see past projects and follow to see me finish this up!

#diy #roomrenovation #roomrefresh #kidsrooms #climbingwall #soccerbedroom
Another to-do checked off my list for spring break Another to-do checked off my list for spring break room makeover!

I added very subtle striping to the wall to mimic a soccer field and keep things classy. ⚽

Stick around to see the next project - a climbing wall!

(And go back in my reels to see the sports wall)

#roommakeover #soccer #kidsroom

Popular Posts:

Ikea Hack: DIY Mudroom Benches
Felt Food Patterns (Link Love)
Babyproofing the stair railings with plexiglass
Free printable Father’s Day questionnaires for dad and grandpa

Recent Posts

  • Functional and Stylish Small Entryway Ideas for a Welcoming Space
  • Pendant & Accent Lights Under $100
  • DIY Stenciled Concrete Floors: Laundry Room Update Part 1
  • First Day and Last Day of School Questionnaire (free printables)
  • How to Create Canvas Wall Art from Digital Photos

>> ABOUT ME
>> DISCLOSURE STATEMENT
>> CONTACT ME

Copyright © 2025 themombot.com
Terms of Service // Privacy Policy