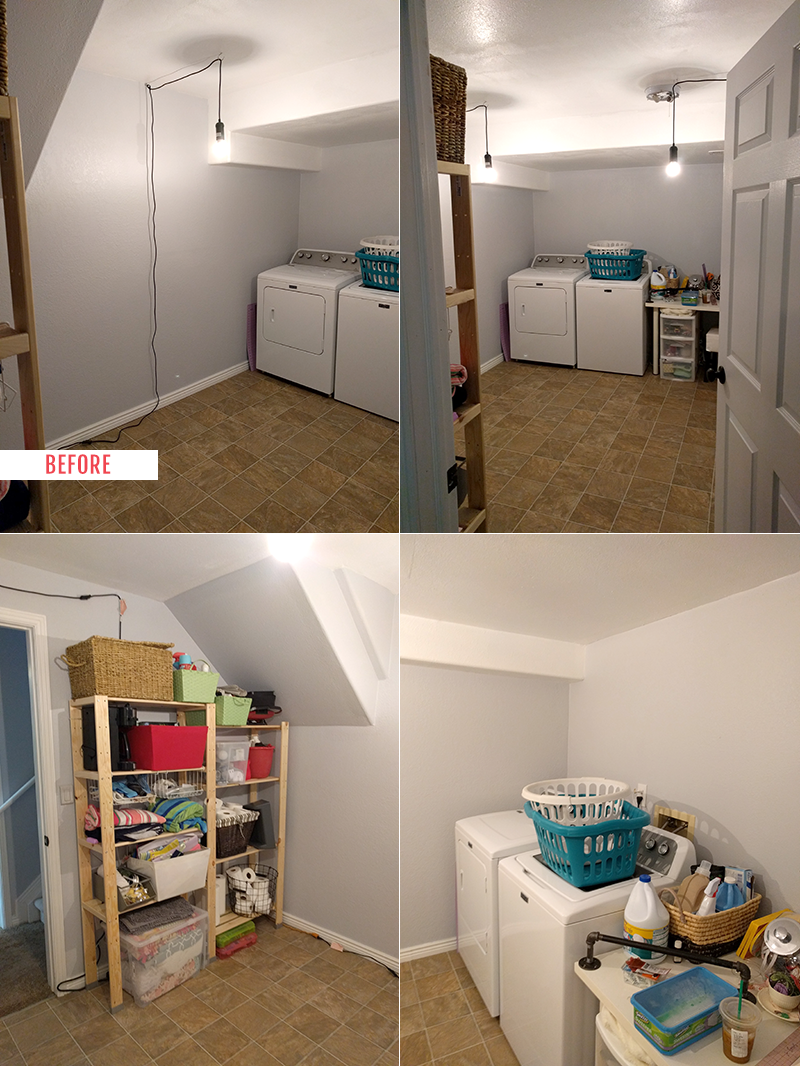
When we first moved into our house 3 years ago, I couldn’t believe the size of our laundry room – It was so spacious! In fact, it was almost too big; I had no idea what to do with it. At first, it was a catch-all storage room with bad lighting. It took a couple of years before I finally decided I couldn’t handle its dysfunction each and every time I did the laundry, and that’s when we finally started working on it.
Laundry Room Redo Phase I: The Laundry Space
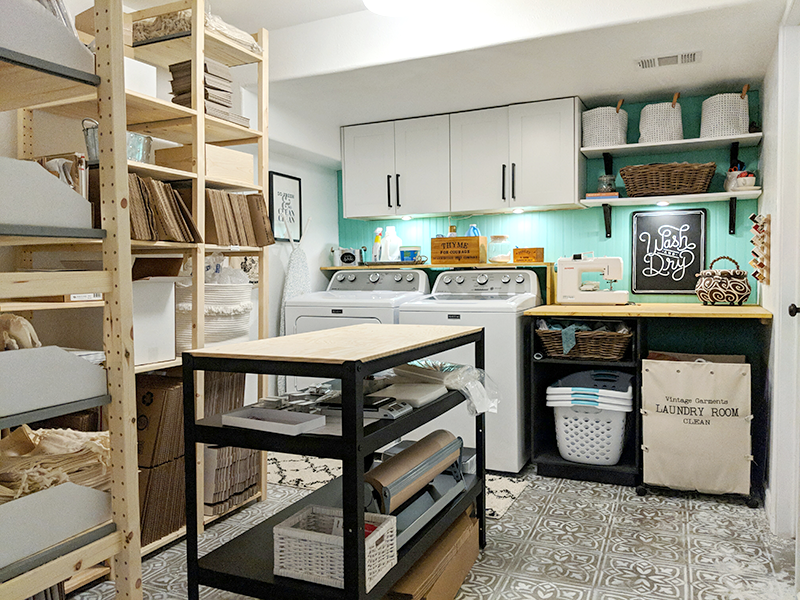
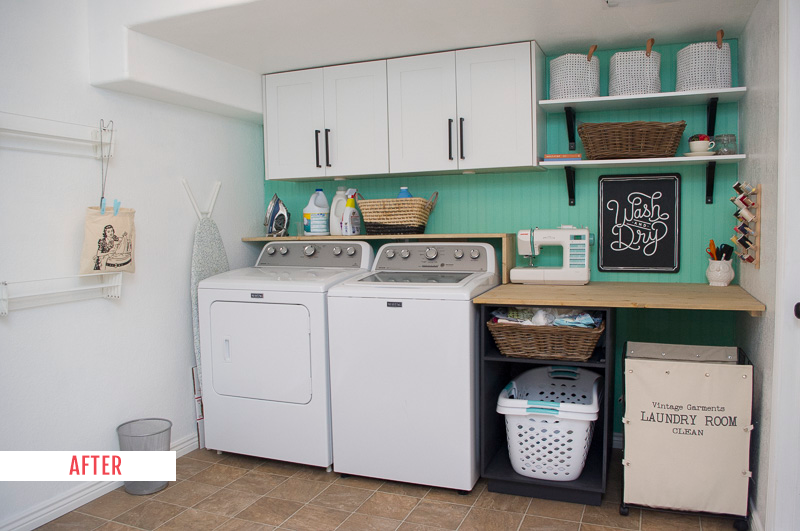
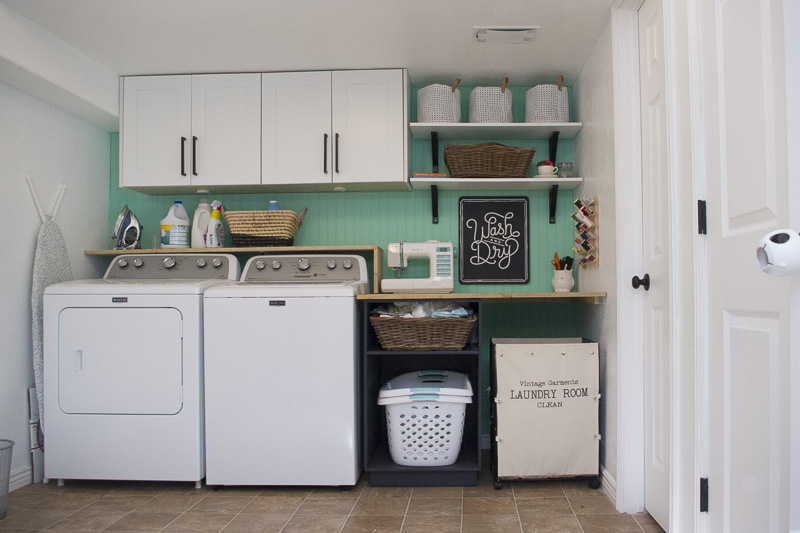
Our first step was to put beadboard on the back wall and paint it Tropical Trail from Behr (the same color as our front door). We then painted all the other walls from blue to white. Next, we put up cabinets and shelving, and built an open cabinet for the laundry baskets, topped with a wooden countertop and cascading shelf to go over the washer and dryer. We also called an electrician to come and hardwire a light in here, because we only had a pull light that was off to the side of the room. What a difference it all made!
I worked hard on this for a couple of weeks and then it sat for a little over a year (because I can’t ever complete anything from start to finish… it’s a problem!), but at least my laundry room was finally functional!
At some point I finally installed the under-cabinet lights from IKEA that I had bought at the start of this reno, which was really easy aside from having to drill holes and do my best to hide cords. But MAN, are those lights worth it!
The final step for this room was to pull up the linoleum and paint the concrete floor underneath. I would have loved to do black and white concrete tile, but the price would have been astronomical based on the size of this room. But the thought of redoing the concrete floors seemed too daunting to me and so I continued to put it off…
Laundry Room Redo Phase II: The Floor
Fast forward to August of this year, when I realized that the extra space in our laundry room would be perfect for an inventory/packaging/shipping space that I desperately needed for work. So I finally got the kick in the pants I needed to pull up that linoleum and finish the floor.
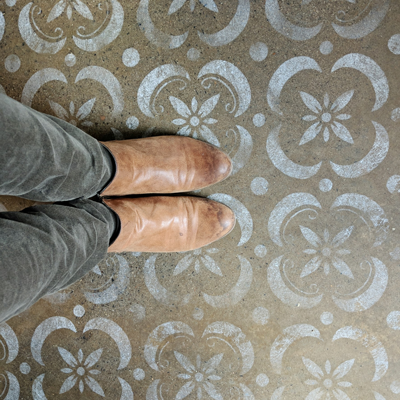
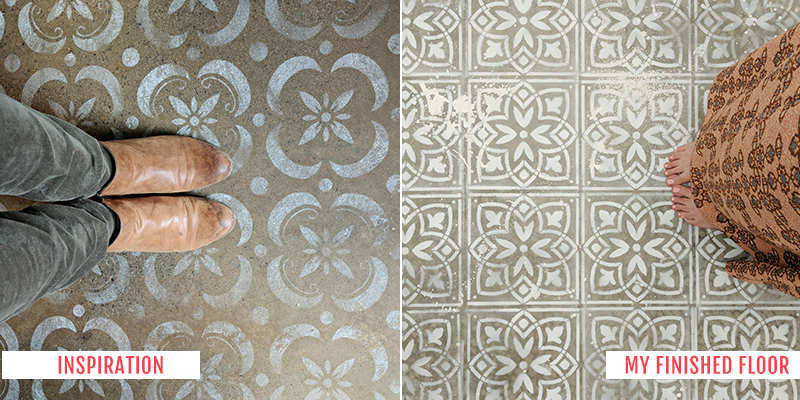
I knew what I wanted it to look like (roughly) and was inspired by a concrete floor I had seen at a local restaurant several months earlier. It would be stenciled in white on top of the unfinished, unpainted concrete. Here’s the inspiration:
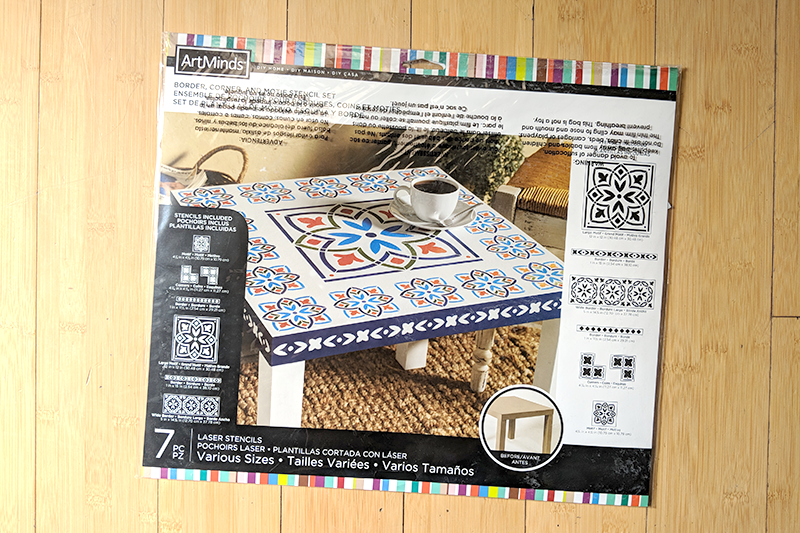
There are so many stencils you can find online, but I decided I was doing this 2 days before (no surprise there) and so I went to Michaels to search for one. I was lucky to find the one I did by Art Minds; it was pretty much the only one that I liked and had the feel I wanted. It came in a pack with other smaller stencils that matched in style, but I only used the big one (12” x 12”) and an edge one at the door threshold.
The process takes some time, but stenciling concrete is incredibly easy and takes just a few supplies:
- 12×12″ Stencil
- String Mop/bucket
- 3 cans of white spray paint in Flat (Rustoleum is much less smelly than Krylon!)
- Concrete sealer (Seal-Krete)
- Roller and brush
How to DIY a Stenciled Concrete Floor:
1. I pulled up the linoleum and vacuumed the concrete underneath. It was dusty and filthy because the people who redid our basement didn’t bother to cover the floor when they were drywalling. They also just threw linoleum down on top of the mess when they were done. What happened to using a broom, guys??
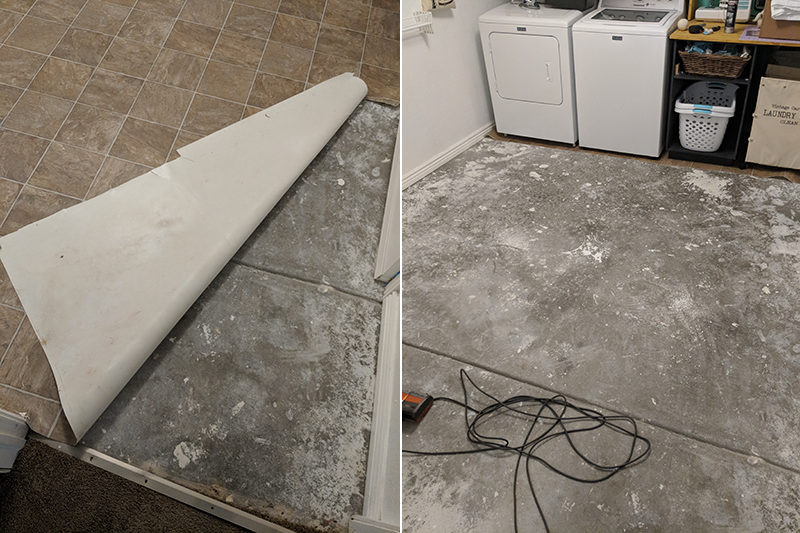
2. So using a string mop like this, I mopped the floor with water and a little dish soap. I also had to scrub those drywall mud spots with a brush to remove them.
3. After it had been scrubbed, I went over it one more time with just clean water and the mop. I let it dry overnight. There were still plenty of white paint spots and splotches, which I decided were ok and added to the character!
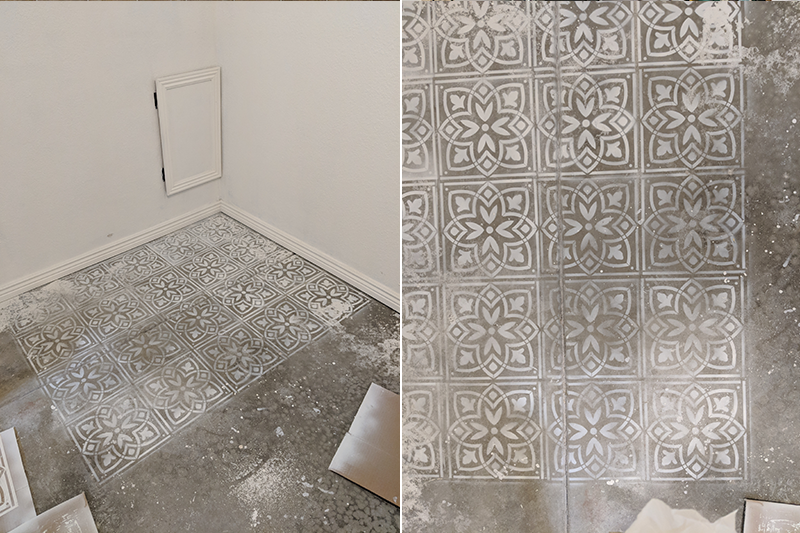
4. Using my 12” x 12” stencil, I slowly made my way around the room with white spray paint.* I surrounded the stencil with 4 pieces of cardboard each time I sprayed so that the design didn’t get muddied with overspray. I just continued to move across the floor this way until I had covered it. I intentionally did some areas lighter than others for a distressed look.
When it was all dry, I went over it with a concrete sealer and a paint roller (semi-smooth) on a long stick. I bought the cheapest concrete sealer I could find at Home Depot from Seal-Krete. This one leaves a nice matte finish as opposed to high shine. All you have to do is pour some on the floor and then spread it with the roller. Easy peasy!
*The reason I used spray paint instead of a roller and porch/concrete paint is because I wanted the design to be faded in areas. I figured I could achieve this easier with spray paint. I was right; it worked perfectly!
The downside to using spray paint was:
- My basement stunk like spray paint for quite a while (there is one small window in the basement that I opened for ventilation and I had fans going while it dried to try and blow the smell outside). I found that Rustoleum stunk less than Krylon brand, but even when I wore masks, I ended up with white spray paint in and around my nostrils!
- My hands were covered in white spray paint the first day I did it and learned to wear gloves the next. Trying to wash it off was a PAIN.
- The more times the stencil gets used, the heavier it gets as it continues to get coated. I think this would still be an issue with a roller and paint, but because of the spray, I began to get strands of dried paint in the open parts of the stencil. It didn’t bother the design too much since I wanted it to look kind of rough, but I didn’t try to get rid of some of those strands before I starting painting on day 2. If I was doing any larger of an area than this, I would have just bought another stencil.
This room, by the way is pretty huge. It’s about 11 1/2 feet by 9 feet. It took me three cans of spray paint, but I honestly could have used one more because I ran out on the area under the washer and dryer (which can’t be seen anyway, so oh well!).
Video Tutorial on DIY Stenciled Concrete Floor
Finished Stenciled Concrete Floor
The end result is quite magical. I am so in love with it!
Next week, I will share the evolution of the rest of this space as my stockroom where I hold inventory and packaging materials!