• The Mombot
  • Gift Guides
  • My Story
  • Food & Drink
  • Life
  • Home
  • DIY
  • Mama Style
  • Shop

The Mombot

Motherhood Simplified.

Memory Keeping for lazy people

April 15, 2016 | 1 Comment

I can title this post as such because I consider myself to be one of those “lazy people” – particularly when it comes to memory keeping.

I feel the draw to hold onto and preserve memories just as much as the next mom, but quite frankly I think our generation is putting WAY too much pressure on doing it. We’re expected to have beautiful scrapbooks or Shutterfly books or Chatbooks documenting every day of our kids’ lives. Because if we don’t, they’ll hate us one day for not caring about them and clearly not loving them enough to preserve memories. Insert eye roll here. Ain’t nobody got time for that.

You know how my mom documented my life? She took some photos every 6 months or so and then threw the roll of undeveloped film into a shoebox. Occasionally she developed the roll, in which case, the photographs got tossed into another shoebox. There were no albums, no handwritten notes with memories, no pretty scrapbook pages. Just a picture of me with some random person that I will likely never identify. This was considered normal.

But today? We put so much pressure on ourselves to preserve. I don’t even know why… I disagree with it and yet I am consumed by it. It’s a complete anomaly.

So while I find memory keeping to be important, I just don’t have the time to go all out; and if I see it as a huge project, I’m less likely to do it. So instead, I find ways to make it easier on myself… hopefully ensuring that it will get done.

The need to simplify memory keeping for myself is what led me to create some of my most popular products for my stationery line, Nuts & Bolts Paper Co. For instance…
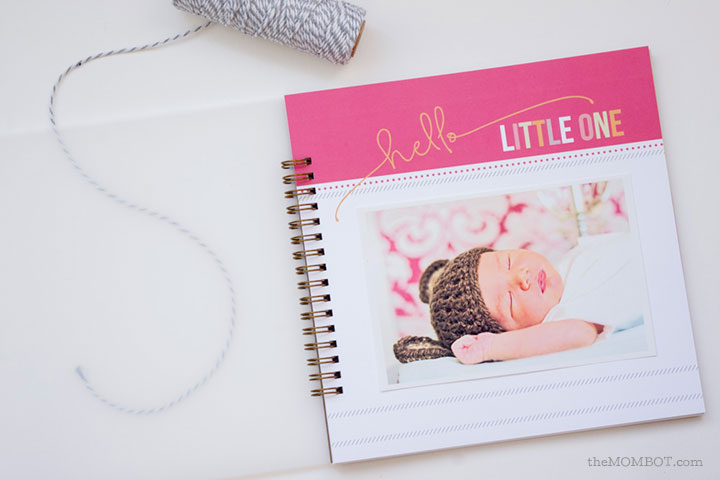
Simple Baby Books

My baby books are fill-as-you-go with simple prompts and spaces for a single photo each month. I designed it while pregnant with baby #3 knowing that my free time would be precious and virtually nonexistent. It turned out to work pretty well and I managed to complete the book shortly after my son turned one. It wasn’t a burden, and quite honestly, it was kind of fun.

baby-book-memory-book

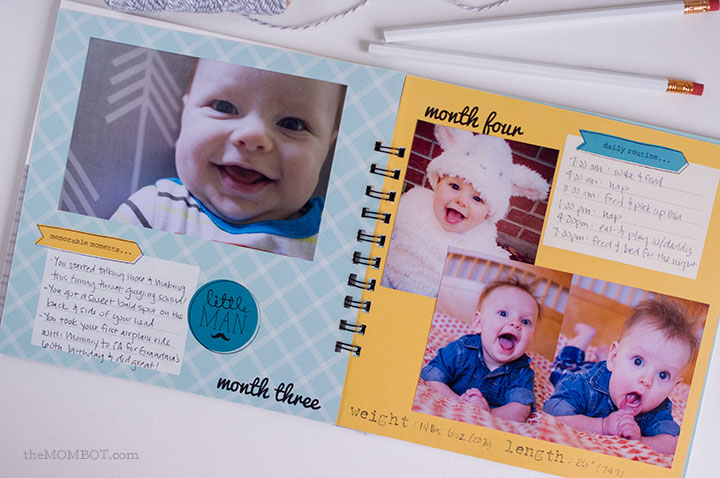
I now have 5 different baby book designs with several optional pages and packages that will help you memory keep all the way through age 5 if desired.

baby-book-memory-book1

[ chalkboard baby album ]

baby-book-memory-book2

[ pink pastel baby album ]

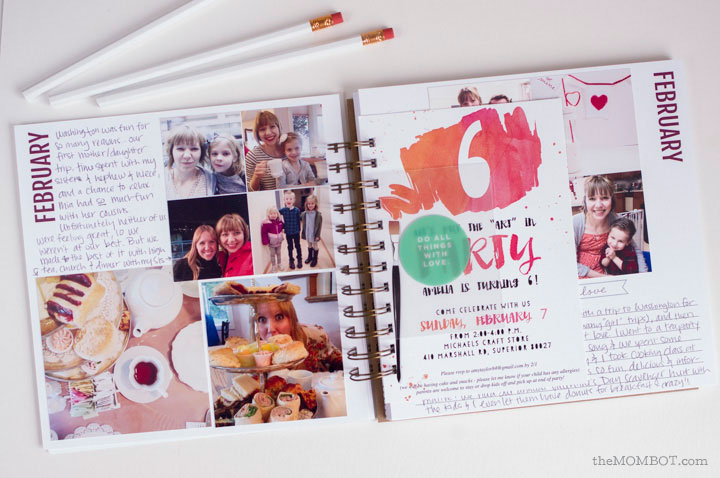
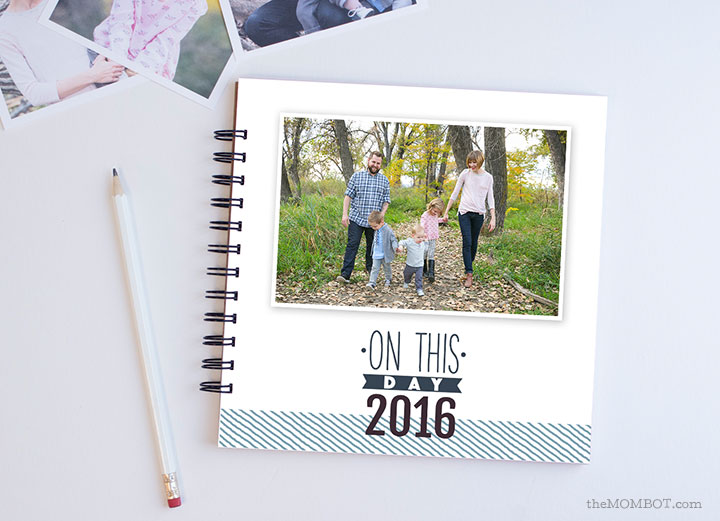
Simple Year-Long Memory Books

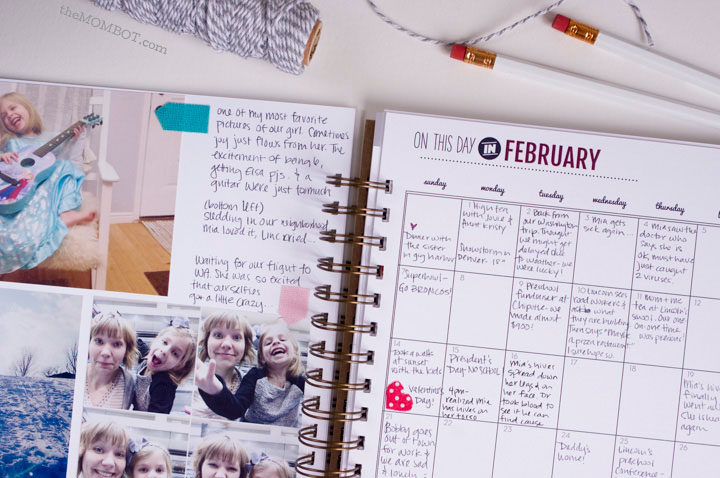
Since the simple baby book design worked so well, I decided to create a year-long album with a similar concept. What I love about this book is that I included a calendar where I can write down a memory each day. Do I write something every day? No. But if my kids say something funny or we actually manage to escape for a date night, I jot it down. There are 3 pages per month to include photos as well, and one space for short journaling about the month.

year-long-memory-book1

[ buy album here ]

I can complete a full month in about 30 minutes by going through my photos from my phone for that month, printing them out (in some cases I also create collages in Photoshop), glueing them in and filling in the journaling spot.

year-long-memory-book2

I’m four months in on this year-long album and I’m totally rocking it (if I do say so myself). And spending a little time each month beats spending 8 hours on a Saturday putting together a year long book on Shutterfly…

on-this-day-cover-memory-keeping

 [ on this day album ]

Another option for yearly memory keeping is by using Chatbooks. If you are a frequent Instagram user, then Chatbooks will compile all your photos from one month along with their captions into a book and automatically send it to you monthly. Nothing like hands-off memory keeping for me to stand up and shout, “yes please!” I use Instagram more often for my business than I do for personal photos, so I don’t go this route, but I know plenty of people who do and love it.
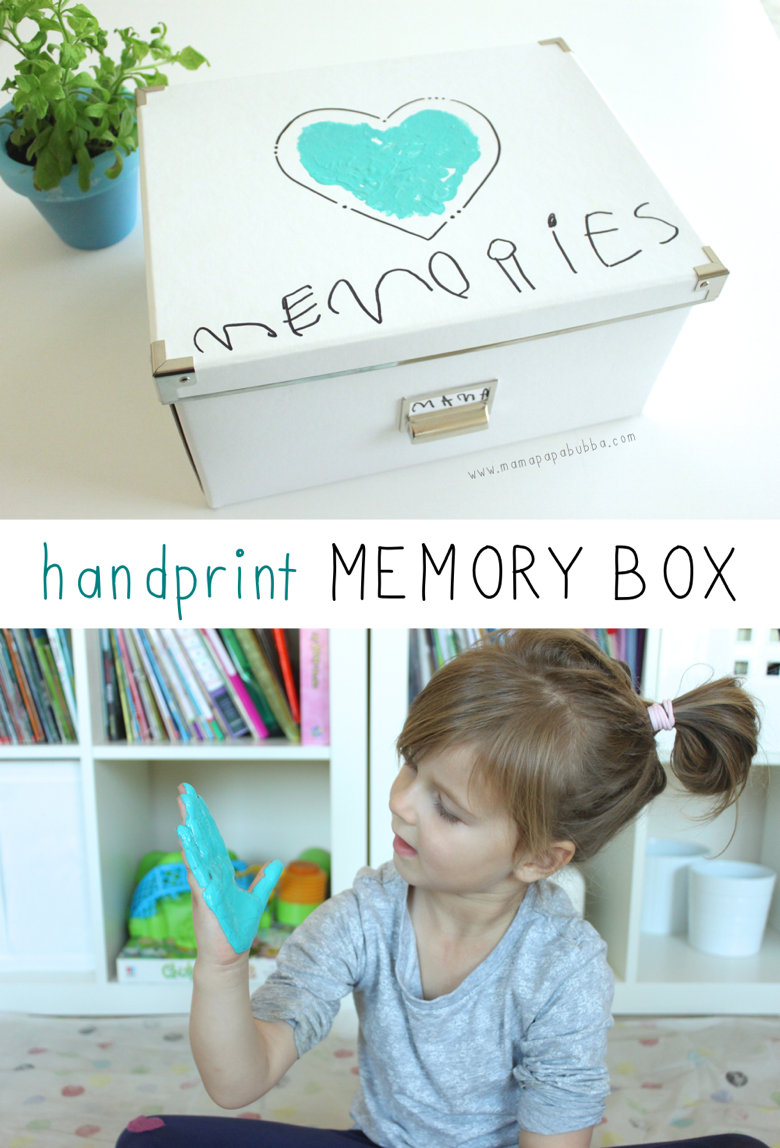
chatbooks1-web

Memory Boxes

The other way that I do simple memory keeping is by creating memory boxes for each child and one for my husband and I. I find that the super affordable office boxes at Ikea work great for this. You can even buy a white one and customize it for your child like Jen did on MamaPapaBubba.com:

Handprint-Memory-Box-Mama.Papa_.Bubba_.

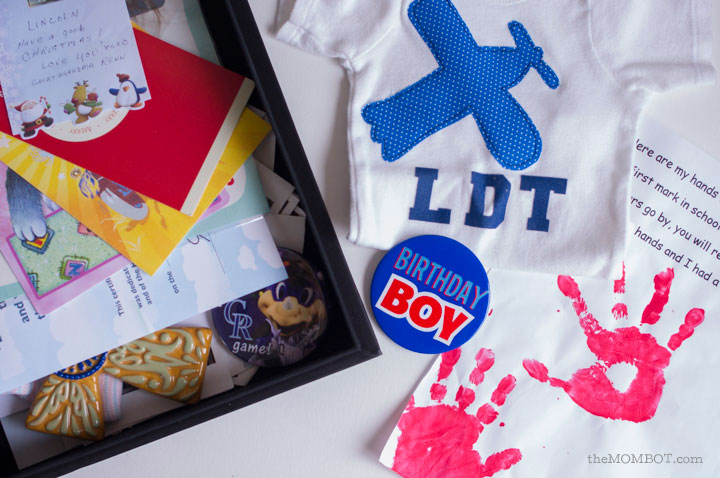
When the kids complete a sport or summer class, I toss the certificate in here. I also put some of their baby items in it like the hat from the hospital, their first hair cut certificate, and some artwork samples from each school year. In the box for my husband and I, I keep cards that we’ve written to each other and other little items. One day we’re going to love going through these items.

kid-memory-keeping

These are the ways that I have found to simplify memory keeping for our family. I combine these with my easy photo organization method found here so that I can quickly and easily sort through photos when it’s time.

This is how I stay up-to-date and totally kill it when it comes to memory keeping. Ok, so I may be a little overly confident, but you get the point.

Related posts:

  1. Documenting Summer with My Kid’s Quote Journal
  2. Funny Father’s Day cards in the shop
  3. Ice cream birthday party
  4. Announcing… Graham! (a little behind schedule)

Filed Under: crafting, Life, organization, photography Tagged With: nuts bolts paper

  • Email
  • Facebook
  • Instagram
  • Pinterest
  • RSS
  • Twitter

HI! I'M AMY.

I'M A BLOGGER, GRAPHIC DESIGNER, MOM, COFFEE ADDICT, DIYER, CHRONIC MULTITASKER AND STRESSCASE, A COOK AND A LOVER OF A GOOD GLASS OF WINE.
LEARN MORE ABOUT ME

Shop My Paper Line:

Favorites:

Instagram:

I get it. It's a little weird. But the girls I've I get it. It's a little weird.
But the girls I've seen do it best, look adorable.

I think it looks best with an oversized tee or sweatshirt, tennies or slides, and a small crossbody bag.

You can't argue with comfort.

For the record, these are women's sleep shorts that I've had a couple of years from Old Navy. If you buy actual men's boxers, you might consider sewing up the pee pocket 😜

Don't spend a lot on this trend; these shorts are made from the thinnest of fabric and shouldn't cost much. Don't be fooled by a retailer that wants you to spend just because it's trendy.

But if you see some cute boxers and want to give it a go - then do! Bonus - if/when the trend ends, you'll have pajamas on the ready 👏

It's solid weekend wear, but I'm not going out to dinner in it...

#boxershortsforgirls #boxershort #ootd #womensfashion #styleinspiration
Another project down in my son's room! I knew I w Another project down in my son's room!

I knew I wanted some sort of built-in feature in this bedroom, but it was hard to figure out what, because we turned it into an active space where he could run and play and needed a lot of room.

So I settled on a built-in bookcase with the slatted design feature, which I'm in love with!

The best part about it is that if he ever decides to upgrade his bed, the space will also accommodate a full or queen size bed going in the opposite direction. It adds so much interest to this room and hopefully will be here for a long time!

One of the things I love most about DIY projects is figuring out how to make something - it's like a giant puzzle. I saw photos of these slotted wall room dividers on Pinterest and just figured it out as I went. All in all, I had very few hiccups and it only took me a few hours to put together. I think I only cursed once?!? And so I call that an extreme DIY win...

Now that the sports wall, the climbing wall, and the built-in feature are complete, the last thing to do in here is some additional painting. I'm thinking of using a contrasting blue color for the closet doors and back side of the built-in, and perhaps trimming out the window with it as well. Then I need to switch out the light for a fan and this.room.is done 🙌

Details: I used two IKEA billy bookshelves, screwed together and secured to the wall. Then wrapped them in white oak plywood. I ripped down 2x4s into 1.5x1.5" square dowels (heavily sanded!) and used pocket holes on the back side of each to secure to the bookshelf and the 1x4 in the ceiling. It's very sturdy!

Go back in my reels to see the other projects from this room! 

#diy #boysroom #roomrenovation #roomrefresh #kidsrooms #climbingwall #soccerbedroom #builtins #bedroomredo #girlswhobuild
This climbing wall took half a day and cost under This climbing wall took half a day and cost under $100!

We are lucky enough to have 13' ceilings in our bedrooms, so a climbing wall seemed to make sense in my son's room as we worked on the remodel.

He is a super active kid with #ADHD, so his room redo has involved lots of activity spaces! Go back in my reels to see past projects and follow to see me finish this up!

#diy #roomrenovation #roomrefresh #kidsrooms #climbingwall #soccerbedroom
Another to-do checked off my list for spring break Another to-do checked off my list for spring break room makeover!

I added very subtle striping to the wall to mimic a soccer field and keep things classy. ⚽

Stick around to see the next project - a climbing wall!

(And go back in my reels to see the sports wall)

#roommakeover #soccer #kidsroom

Popular Posts:

Ikea Hack: DIY Mudroom Benches
Felt Food Patterns (Link Love)
Babyproofing the stair railings with plexiglass
DIY Outdoor Boot Rack

Recent Posts

  • Functional and Stylish Small Entryway Ideas for a Welcoming Space
  • Pendant & Accent Lights Under $100
  • DIY Stenciled Concrete Floors: Laundry Room Update Part 1
  • First Day and Last Day of School Questionnaire (free printables)
  • How to Create Canvas Wall Art from Digital Photos

>> ABOUT ME
>> DISCLOSURE STATEMENT
>> CONTACT ME

Copyright © 2025 themombot.com
Terms of Service // Privacy Policy