• The Mombot
  • Gift Guides
  • My Story
  • Food & Drink
  • Life
  • Home
  • DIY
  • Mama Style
  • Shop

The Mombot

Motherhood Simplified.

Art themed birthday party

February 22, 2016 | 1 Comment

art-theme-birthday-party-headerimg

I’ve been trying to convince my daughter to do an art party for a couple of years now. She has always loved crafting (she is mine, after all), but up until this year she was too into princesses and mermaids to want to have an art party (view past birthdays parties here). I guess 6 is the magic number, because this year she finally gave in.

I decided to host the party at a local Michaels Craft Store, and it was AWESOME. Shout out to Michaels… they let me use their craft room for free, and I had to ask them “are you sure?” about 4 times before I believed them. So there was no need to clean my house pre-party and no need to clean my house post-party and the venue didn’t cost me a cent (can you hear the hallelujahs?). To be clear, if you wanted an associate in the room with you to help facilitate or go fetch supplies from the store, or if you wanted a staff and pre-planned crafts, there is a fee. But if you plan to just use the room on your own, there is no charge.

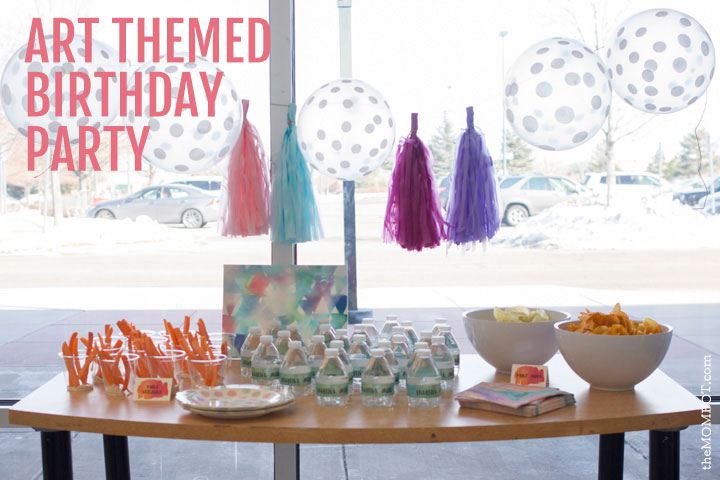
I found some easy crafting ideas online and used the weeks prior to the party to buy supplies when they were on sale or when I had a coupon; this made the party quite cost efficient. We hosted in the afternoon, so I only had a small table with some snacks and water. In short, it was the easiest birthday party I’ve hosted so far!

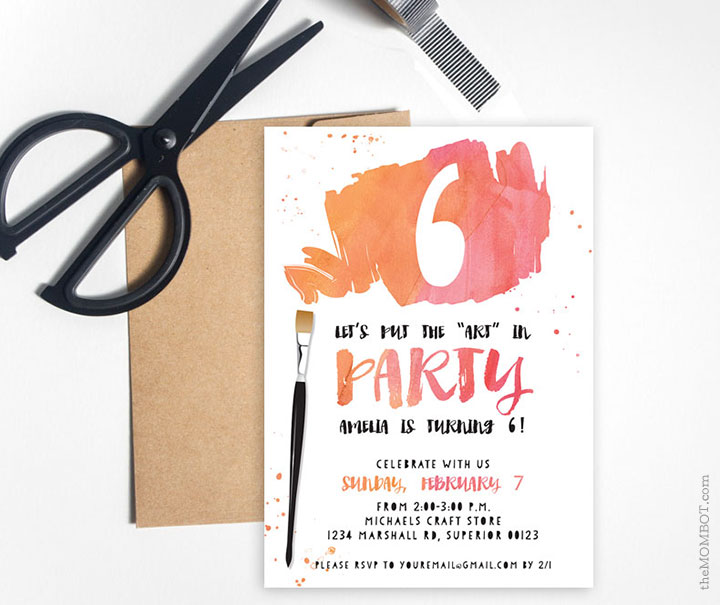
The invite was designed by me (naturally) and is now available in my shop.

art-birthday-arty-invite

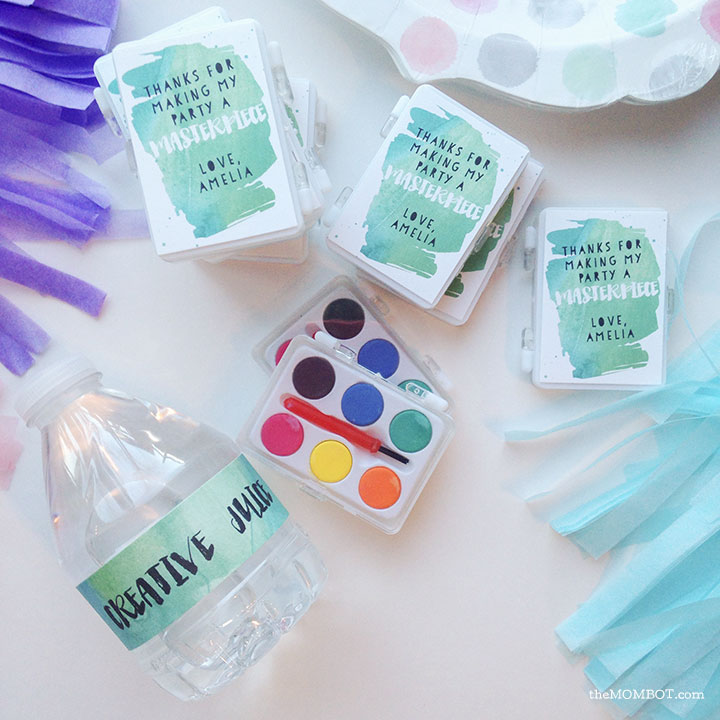
Favors were these adorable mini paint sets that were $12/12 purchased from Amazon. I made little tags that read “Thanks for making my party a masterpiece” and attached them to the back of the paint sets with glue dots. They were smaller than I expected when they came in the mail, but since the girls also all went home with their art projects and their art smock, I felt like it was sufficient for a favor.

art-theme-birthday-party-favors

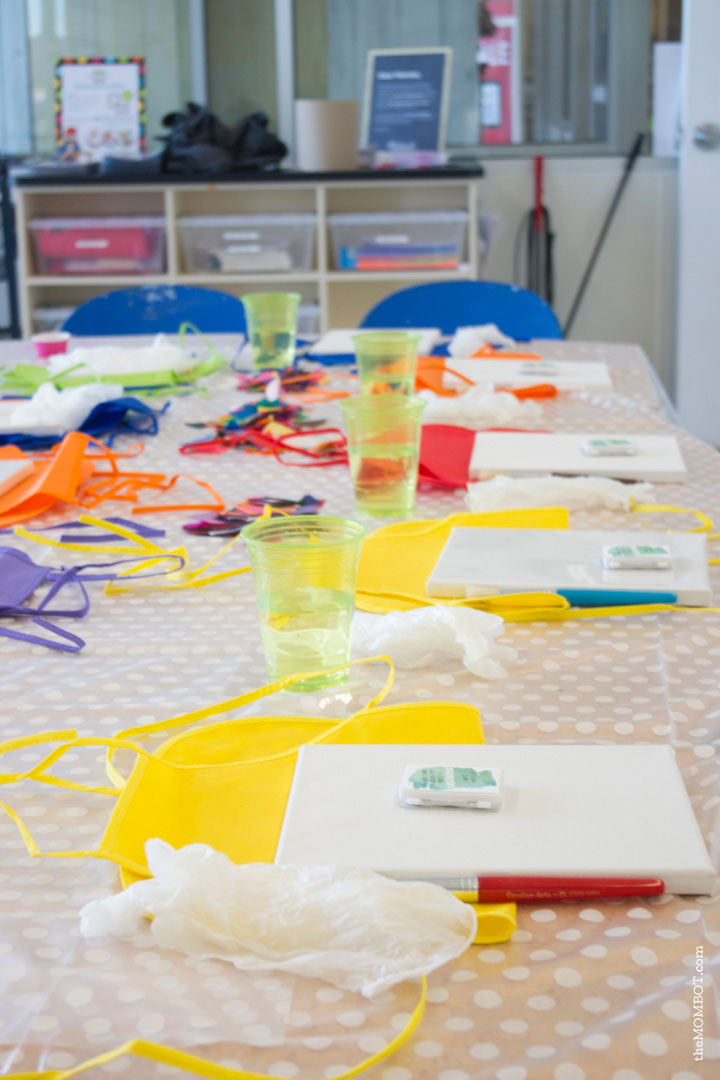
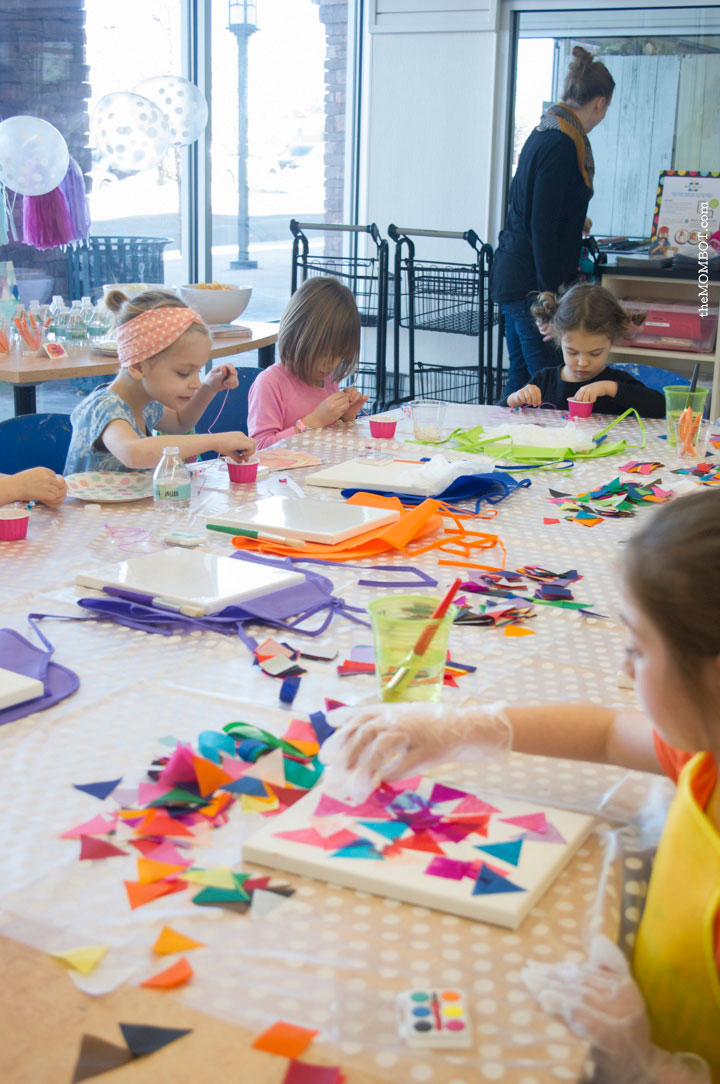
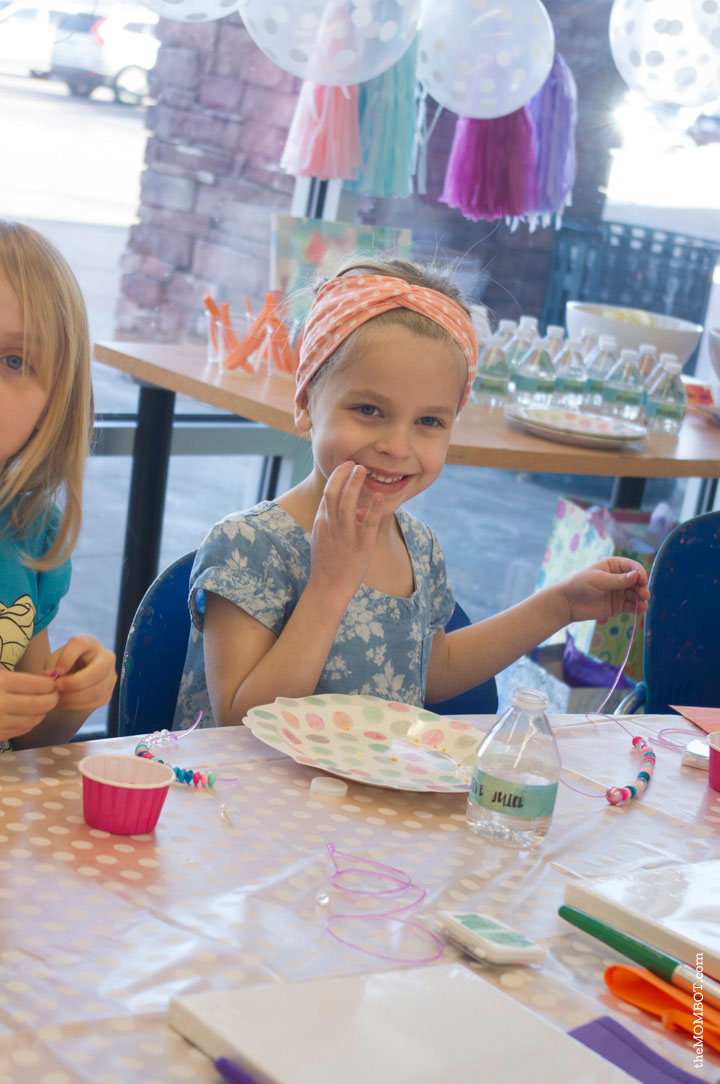
Speaking of art projects, the two easy crafts that I set up for the kids were canvases decorated with color bleed tissue paper (such a cool project that I will talk about next week) and making their own necklaces and and bracelets. The color bleed canvases didn’t require paint, which kept the mess to a minimum. All we needed besides canvases and tissue paper were paintbrushes (10-pack purchased for $6.81 on Amazon), art smocks (12-pack purchased for $9.99 on Amazon), latex gloves (so the color doesn’t stain their hands), and water.

art-theme-birthday-party-tablesetup

art-theme-birthday-party-tablesetup2

art-theme-birthday-party-necklaces

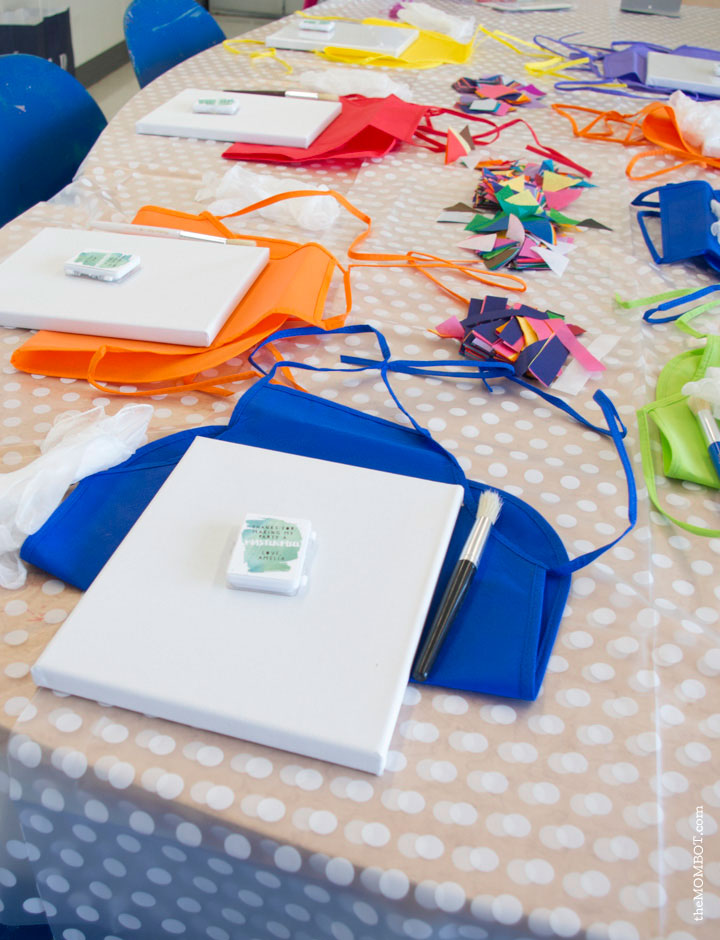
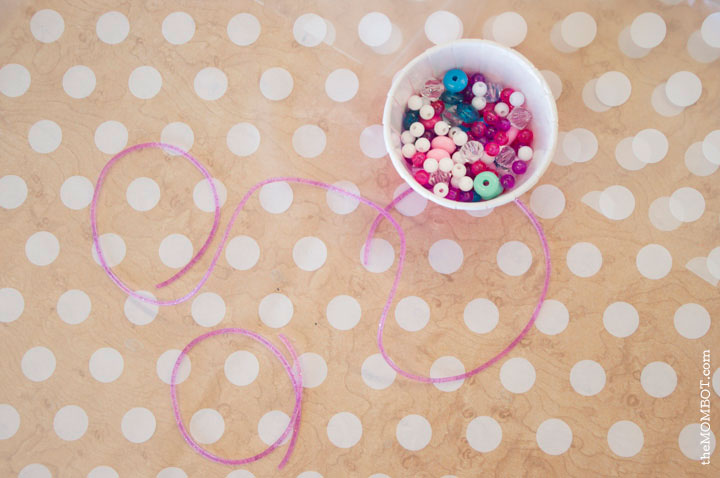
Necklaces were just made from assorted beads and sparkly lanyards purchased from Michaels. To keep things from getting too crazy, I had half of the girls start with the canvases and the other half make their necklaces and bracelets. It helped keep chaos to a minimum!

art-theme-birthday-party-girlsatwork

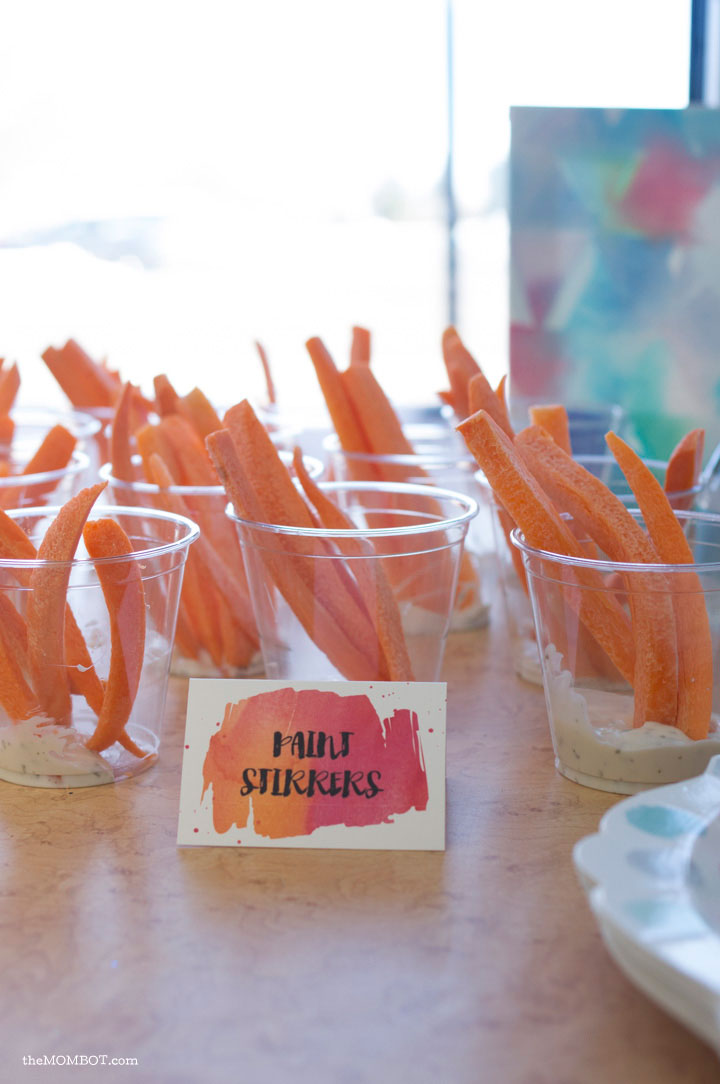
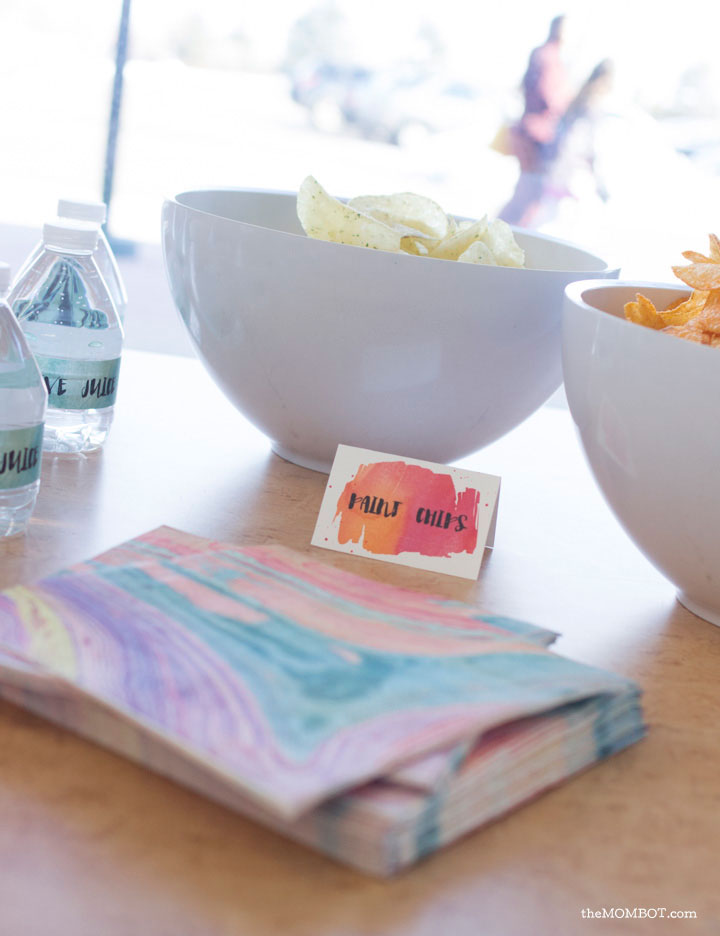
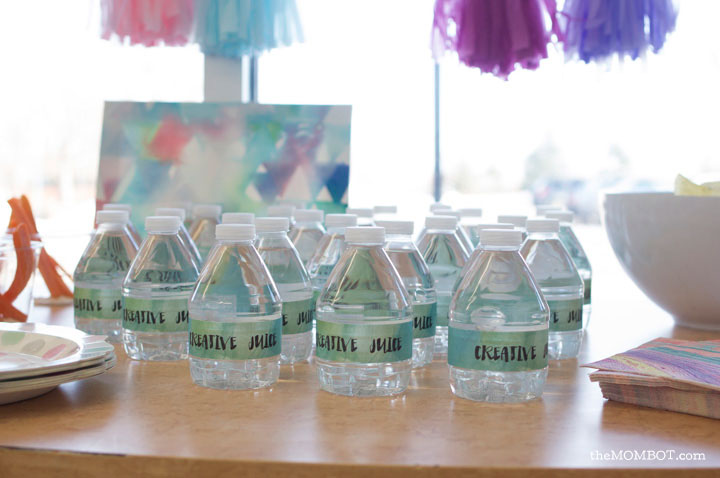
The snacks were comprised of some ideas I had found online: potato chips labeled “paint chips,” water bottles labeled “creative juice” and some ranch dressing and carrot sticks labeled “paint stirrers.”

art-theme-birthday-party-paintstirrers

art-theme-birthday-party-paintchips

art-theme-birthday-party-creativejuice

art-theme-birthday-party-creativejuice2

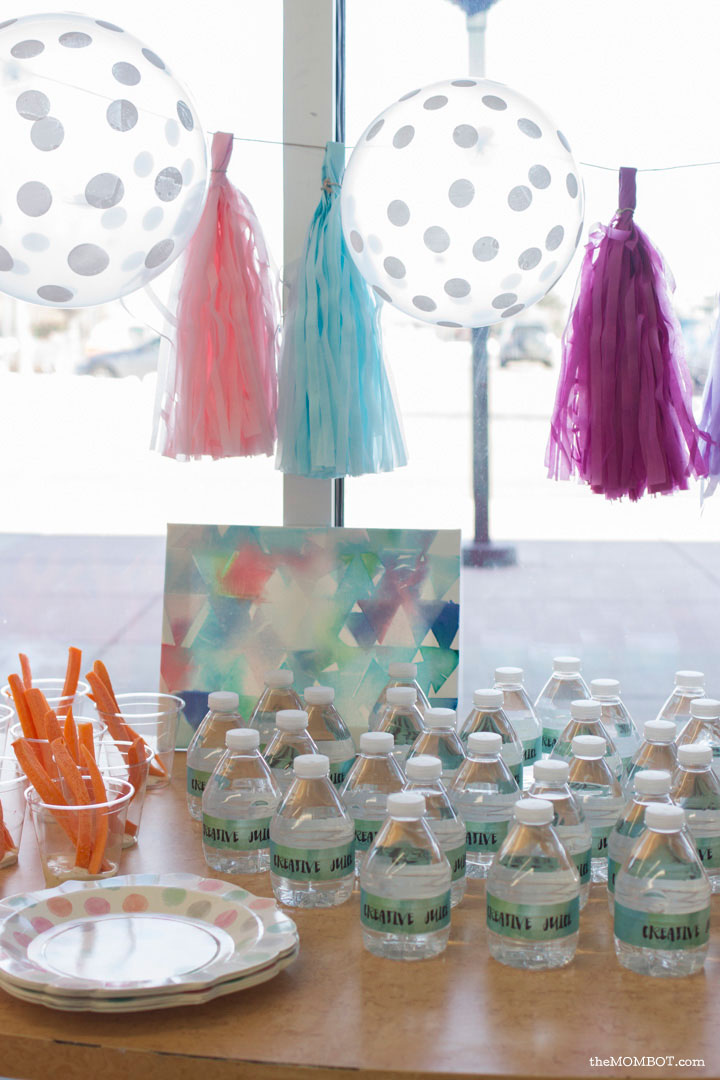
I found the cutest plates, napkins and tassel banner in a watercolor theme at Target, and the polka dot balloons and tablecloths were from Hobby Lobby.

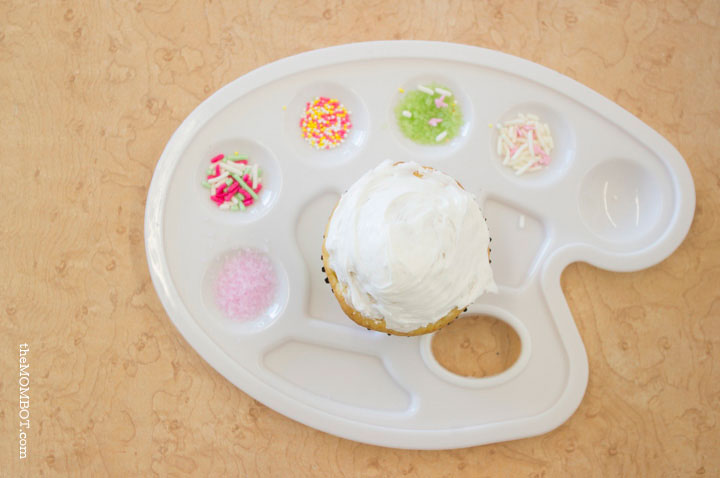
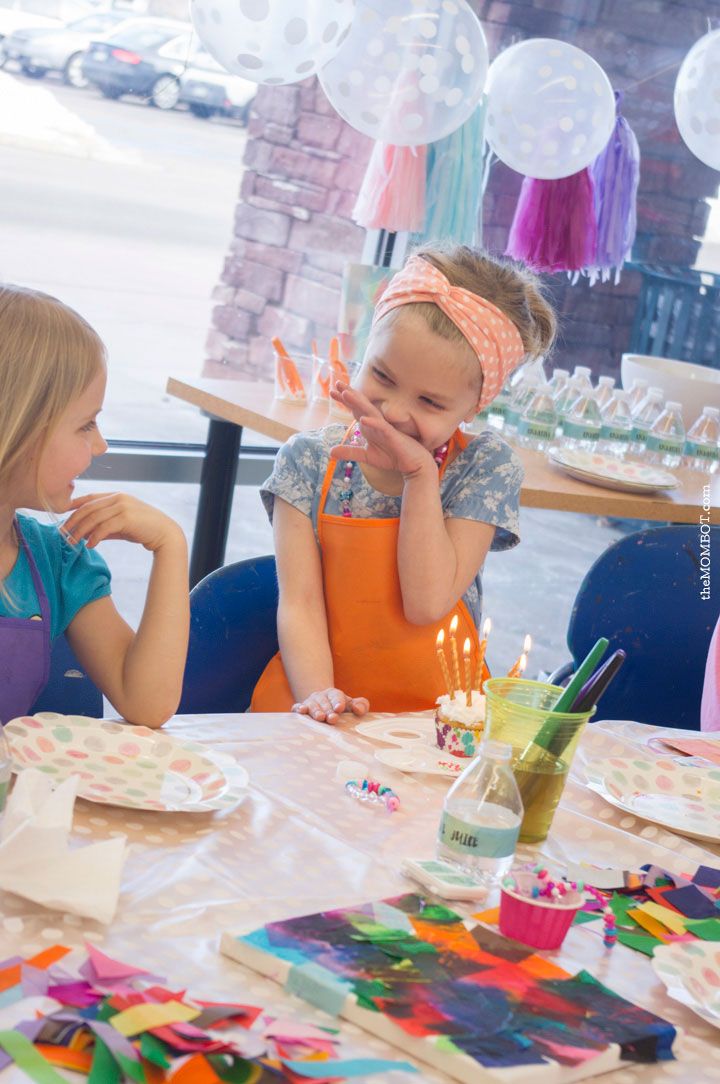
The party ended with each girl being able to decorate their own cupcake with sprinkles separated on an artist’s palette. I bought a 12-pack of these plastic palettes for less than $10 on Amazon. The girls had so much fun decorating and eating their cupcakes and it was another little activity for them to do. I’m pretty sure every girl used every last sprinkle on their plate!

art-theme-birthday-party-decorate-cupcake

The birthday girl got a kick out of being sung to (she loves attention). And the pure joy on her face is the only thing I ever need to make all the work feel worth it.

art-theme-birthday-party-birthdaygirl

art-theme-birthday-party-birthdaygirl2

Happy birthday to my sweet, crafty girl – may year 6 be the best one yet!

Related posts:

  1. Little Mermaid Birthday Party
  2. A very pink Curious George birthday party
  3. Funny Father’s Day cards in the shop
  4. Lincoln’s office-themed 1st birthday party

Filed Under: crafting Tagged With: birthday, etsy, nuts bolts paper, party

  • Email
  • Facebook
  • Instagram
  • Pinterest
  • RSS
  • Twitter

HI! I'M AMY.

I'M A BLOGGER, GRAPHIC DESIGNER, MOM, COFFEE ADDICT, DIYER, CHRONIC MULTITASKER AND STRESSCASE, A COOK AND A LOVER OF A GOOD GLASS OF WINE.
LEARN MORE ABOUT ME

Shop My Paper Line:

Favorites:

Instagram:

I get it. It's a little weird. But the girls I've I get it. It's a little weird.
But the girls I've seen do it best, look adorable.

I think it looks best with an oversized tee or sweatshirt, tennies or slides, and a small crossbody bag.

You can't argue with comfort.

For the record, these are women's sleep shorts that I've had a couple of years from Old Navy. If you buy actual men's boxers, you might consider sewing up the pee pocket 😜

Don't spend a lot on this trend; these shorts are made from the thinnest of fabric and shouldn't cost much. Don't be fooled by a retailer that wants you to spend just because it's trendy.

But if you see some cute boxers and want to give it a go - then do! Bonus - if/when the trend ends, you'll have pajamas on the ready 👏

It's solid weekend wear, but I'm not going out to dinner in it...

#boxershortsforgirls #boxershort #ootd #womensfashion #styleinspiration
Another project down in my son's room! I knew I w Another project down in my son's room!

I knew I wanted some sort of built-in feature in this bedroom, but it was hard to figure out what, because we turned it into an active space where he could run and play and needed a lot of room.

So I settled on a built-in bookcase with the slatted design feature, which I'm in love with!

The best part about it is that if he ever decides to upgrade his bed, the space will also accommodate a full or queen size bed going in the opposite direction. It adds so much interest to this room and hopefully will be here for a long time!

One of the things I love most about DIY projects is figuring out how to make something - it's like a giant puzzle. I saw photos of these slotted wall room dividers on Pinterest and just figured it out as I went. All in all, I had very few hiccups and it only took me a few hours to put together. I think I only cursed once?!? And so I call that an extreme DIY win...

Now that the sports wall, the climbing wall, and the built-in feature are complete, the last thing to do in here is some additional painting. I'm thinking of using a contrasting blue color for the closet doors and back side of the built-in, and perhaps trimming out the window with it as well. Then I need to switch out the light for a fan and this.room.is done 🙌

Details: I used two IKEA billy bookshelves, screwed together and secured to the wall. Then wrapped them in white oak plywood. I ripped down 2x4s into 1.5x1.5" square dowels (heavily sanded!) and used pocket holes on the back side of each to secure to the bookshelf and the 1x4 in the ceiling. It's very sturdy!

Go back in my reels to see the other projects from this room! 

#diy #boysroom #roomrenovation #roomrefresh #kidsrooms #climbingwall #soccerbedroom #builtins #bedroomredo #girlswhobuild
This climbing wall took half a day and cost under This climbing wall took half a day and cost under $100!

We are lucky enough to have 13' ceilings in our bedrooms, so a climbing wall seemed to make sense in my son's room as we worked on the remodel.

He is a super active kid with #ADHD, so his room redo has involved lots of activity spaces! Go back in my reels to see past projects and follow to see me finish this up!

#diy #roomrenovation #roomrefresh #kidsrooms #climbingwall #soccerbedroom
Another to-do checked off my list for spring break Another to-do checked off my list for spring break room makeover!

I added very subtle striping to the wall to mimic a soccer field and keep things classy. ⚽

Stick around to see the next project - a climbing wall!

(And go back in my reels to see the sports wall)

#roommakeover #soccer #kidsroom

Popular Posts:

Ikea Hack: DIY Mudroom Benches
Felt Food Patterns (Link Love)
Babyproofing the stair railings with plexiglass
DIY Outdoor Boot Rack

Recent Posts

  • Functional and Stylish Small Entryway Ideas for a Welcoming Space
  • Pendant & Accent Lights Under $100
  • DIY Stenciled Concrete Floors: Laundry Room Update Part 1
  • First Day and Last Day of School Questionnaire (free printables)
  • How to Create Canvas Wall Art from Digital Photos

>> ABOUT ME
>> DISCLOSURE STATEMENT
>> CONTACT ME

Copyright © 2025 themombot.com
Terms of Service // Privacy Policy