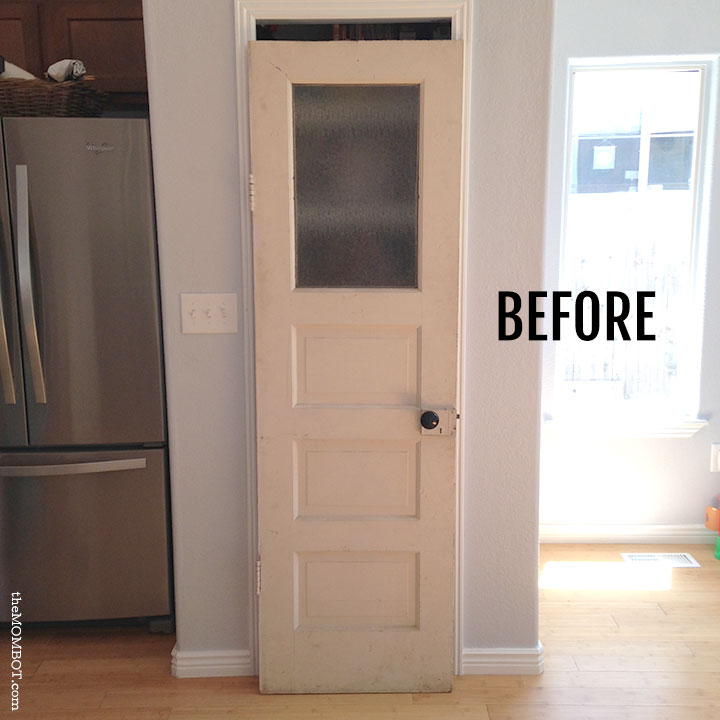
When we first moved into our house, our small pantry had a bi-fold closet door on it. This was a problem for two reasons:
- The already small opening to the pantry was made even smaller when you opened the door and pushed it to one side.
- It was lame.
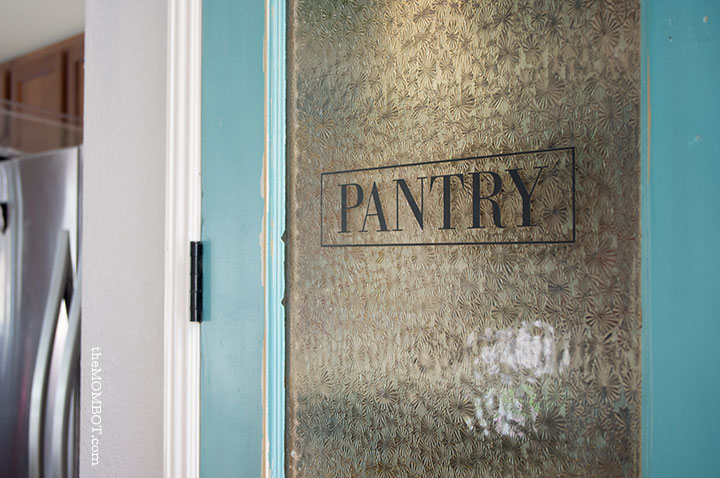
I knew even before we moved in that it would be so dreamy to have a vintage-looking pantry door with a window, so I used the lame bi-fold door as an excuse to make that happen. I starting visiting flea markets and vintage stores in my area to find the right door. We’ve got some pretty good ones, so it wasn’t long before I found this beauty:
I didn’t take her home at first even though she was the exact width I needed (which surprised me, because the opening is only 2 feet and I thought it wouldn’t be a standard or easy-to-find size). She was a little pricey and a bit too short for the door frame (but I was pretty sure I could fix that). In the end, I just couldn’t say no to the black vintage door knob and floral etched glass window, so I haggled with the seller and got a bit knocked off the price. Then I sold my bed frame to pay for it… priorities. (we did plan on selling the bed anyway, so it wasn’t quite as crazy as it sounds)
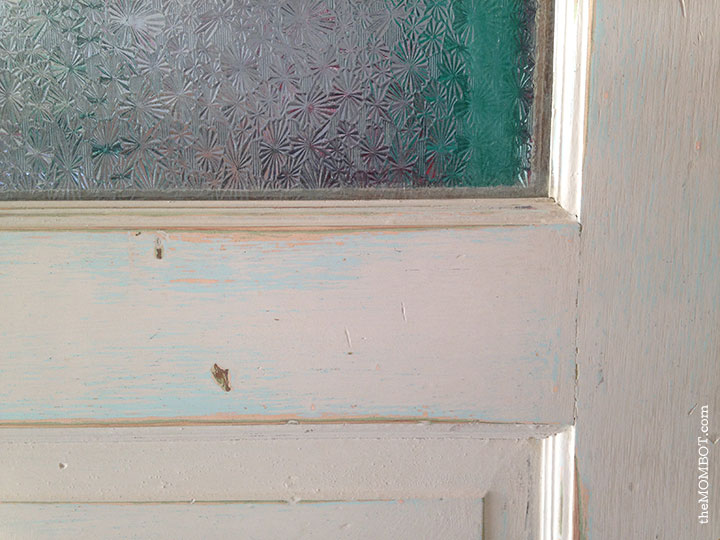
I loved how beat up the door was and I love thinking about the home(s) she has inhabited and the stories she could tell. If walls doors could talk.
My first step was to sand her down a bit. I really just wanted to roughen up the surface and smooth out the spots that I had filled with wood filler. When I began sanding, I discovered that she used to be a lovely teal color, only slightly lighter than the color I chose to paint her. I definitely planned on letting all these old paint colors show through.
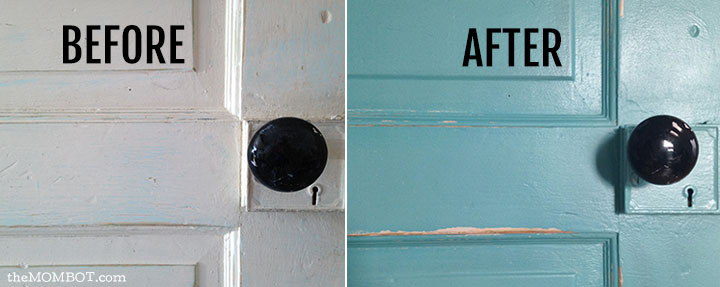
To keep the vintage look, I wanted to do some distressing after I painted the door, so I tried the Vaseline technique. If you’ve never done it before, basically you slather some Vaseline on in various spots, paint, and then wipe away where the Vaseline was to show what is underneath. I don’t think I did it right (it was my first time)… my guess is that it would work better if you were spray painting something as opposed to rolling on two coats of paint over the Vaseline; and I also don’t think I put enough Vaseline on.
BUT, in the end, it worked out better than I could have hoped. I couldn’t really remember where I put the Vaseline (oops), except that it was on some of the edges. So I started rubbing the edges with a light sandpaper, and as I did that, the spots that had Vaseline started to sort of peel away (it didn’t just “wipe” away with a cloth my tutorial said it would), revealing the old layers of paint. Some of the spots kept peeling and peeling and peeling and it took some work to get them to look ok and not take off too much of my paint job. I ended up with layers of off-white, light teal and natural wood peeking through on various edges of the door (*dreamy*).
After I was happy with my strategic sanding, I used another distressing technique by rubbing some steel wool along the edges. This left a darkened color over the teal, which I think adds to the aged look. Once I was happy with that process, I sprayed the whole thing with polyurethane. I kept the backside of the door as is, because I loved how old and vintage it looked. Because I only re-did the front side, I was done in just a couple of hours – my favorite kind of project!
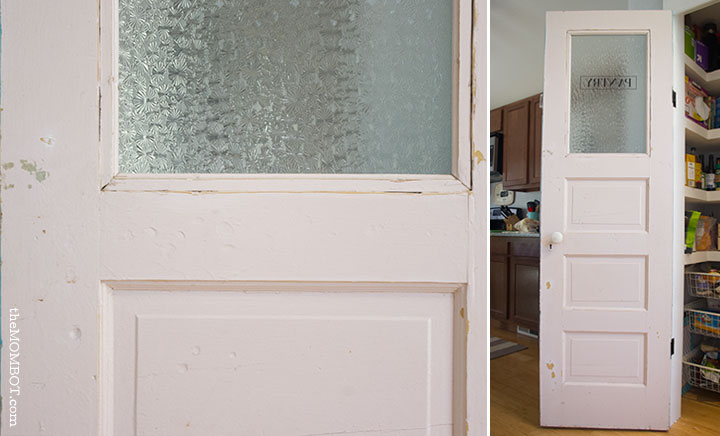
Once the door was complete, I added a “pantry” vinyl sticker to the window. I purchased it from Lundt Lettering & Design on Etsy; I scoured Etsy for just the right font and she had exactly what I was looking for and also made it for me in the size I needed.
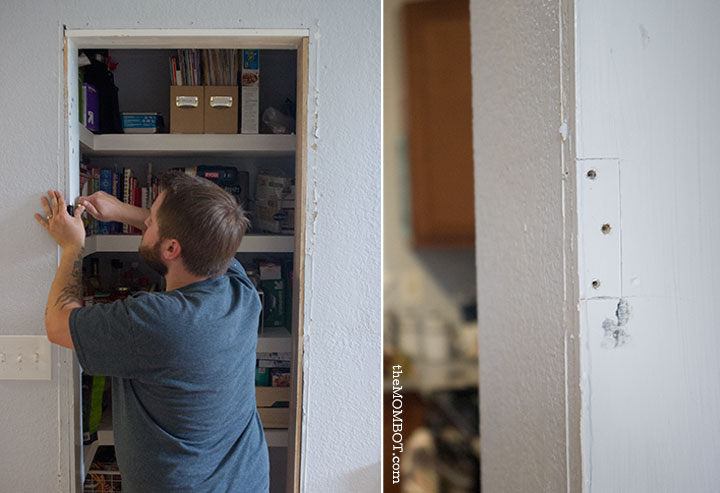
The hard part came in trying to get the door hung. I’ve never done this before guys; it was a learning process.
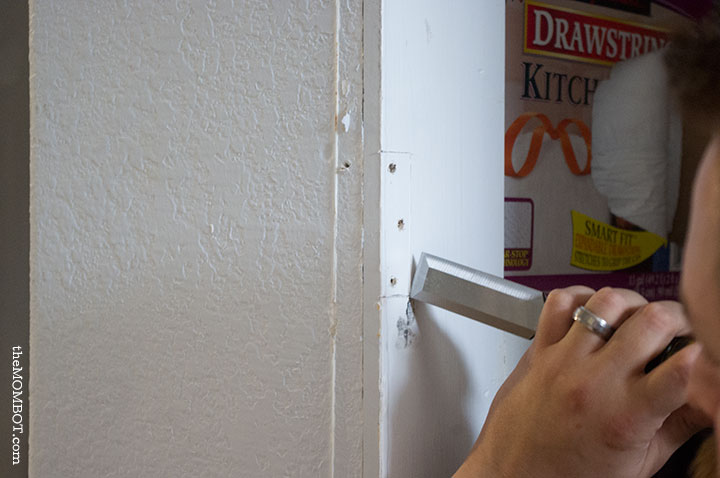
We had to buy some chisels and chisel out a spot for the hinges in the door frame. We also had to remove one of the boards on the door frame because it was too thick and the door didn’t fit like I thought it would. So we replaced that with a thinner board and the door slid right in… well, mostly. There were a couple times where we had to take the door outside and sand one side and repaint because the door wasn’t square and wouldn’t close correctly (ah the beauty of working with vintage items). We also discovered that we had to re-nail the trim on the left side of the door frame because it was pulling out when we opened the door.
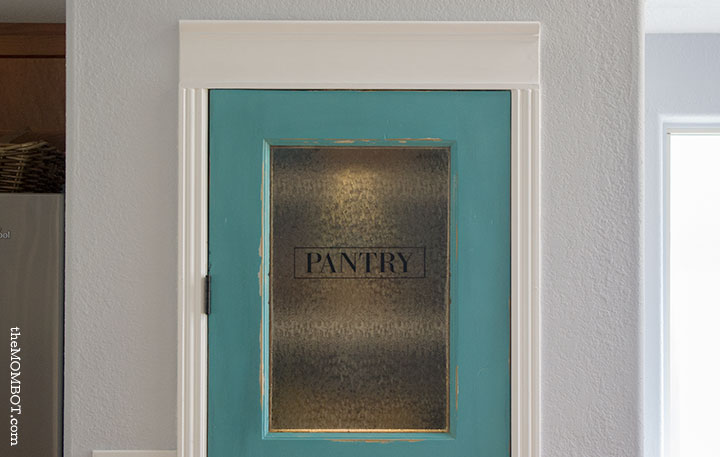
To cover the gap above the door in the doorway, I used various wood and trim pieces to trim it out and make it look pretty. It allowed me to be creative, which was kind of fun.
The door knob, lock and latch actually sits out from the door, so we had to figure out how to get the door to latch since it would be sitting on top of the door frame. So we cut a block of wood the same size as the door knob/lock piece and chiseled out a hole for the latch – worked like a charm.

After a very ugly afternoon that had my psycho-mom head spinning and steam coming out of my ears when my son pushed the door all the way in (note: it is supposed to open out…) and ripped the top hinge out of the frame, we decided to attach a small board to the inside of the door frame on the right to stop the door once it closed (like I said, this was a learning process). We then had to buy some self-anchoring screws to get the hinge back in the frame… ugh.
Final steps were caulking all the trim and painting it all white. And of course, adding a little battery operated light to the top of the inner door frame so that it looked cool in photos (and for when I need light at night, I suppose).
I am so thrilled with the final product. It was a totally new experience for us and I am pretty proud of us for making it work despite the hiccups!

Is it sad that I am already feeling conflicted about leaving it here if/when we sell our house (in the very far, far future)?